Anycast CDN Resource Management
You can manage all Anycast CDN resources in a single section of the user panel.

¶ Add a new resource
If you want to add one or more domains to the CDN, create a new Anycast CDN resource. To do this, click the Create new button in the upper left corner of the CDN DASHBOARD section:
.png)
or click the Create new CDN resource button in the lower right corner of the CDN RESOURCES section as shown below:
.png)
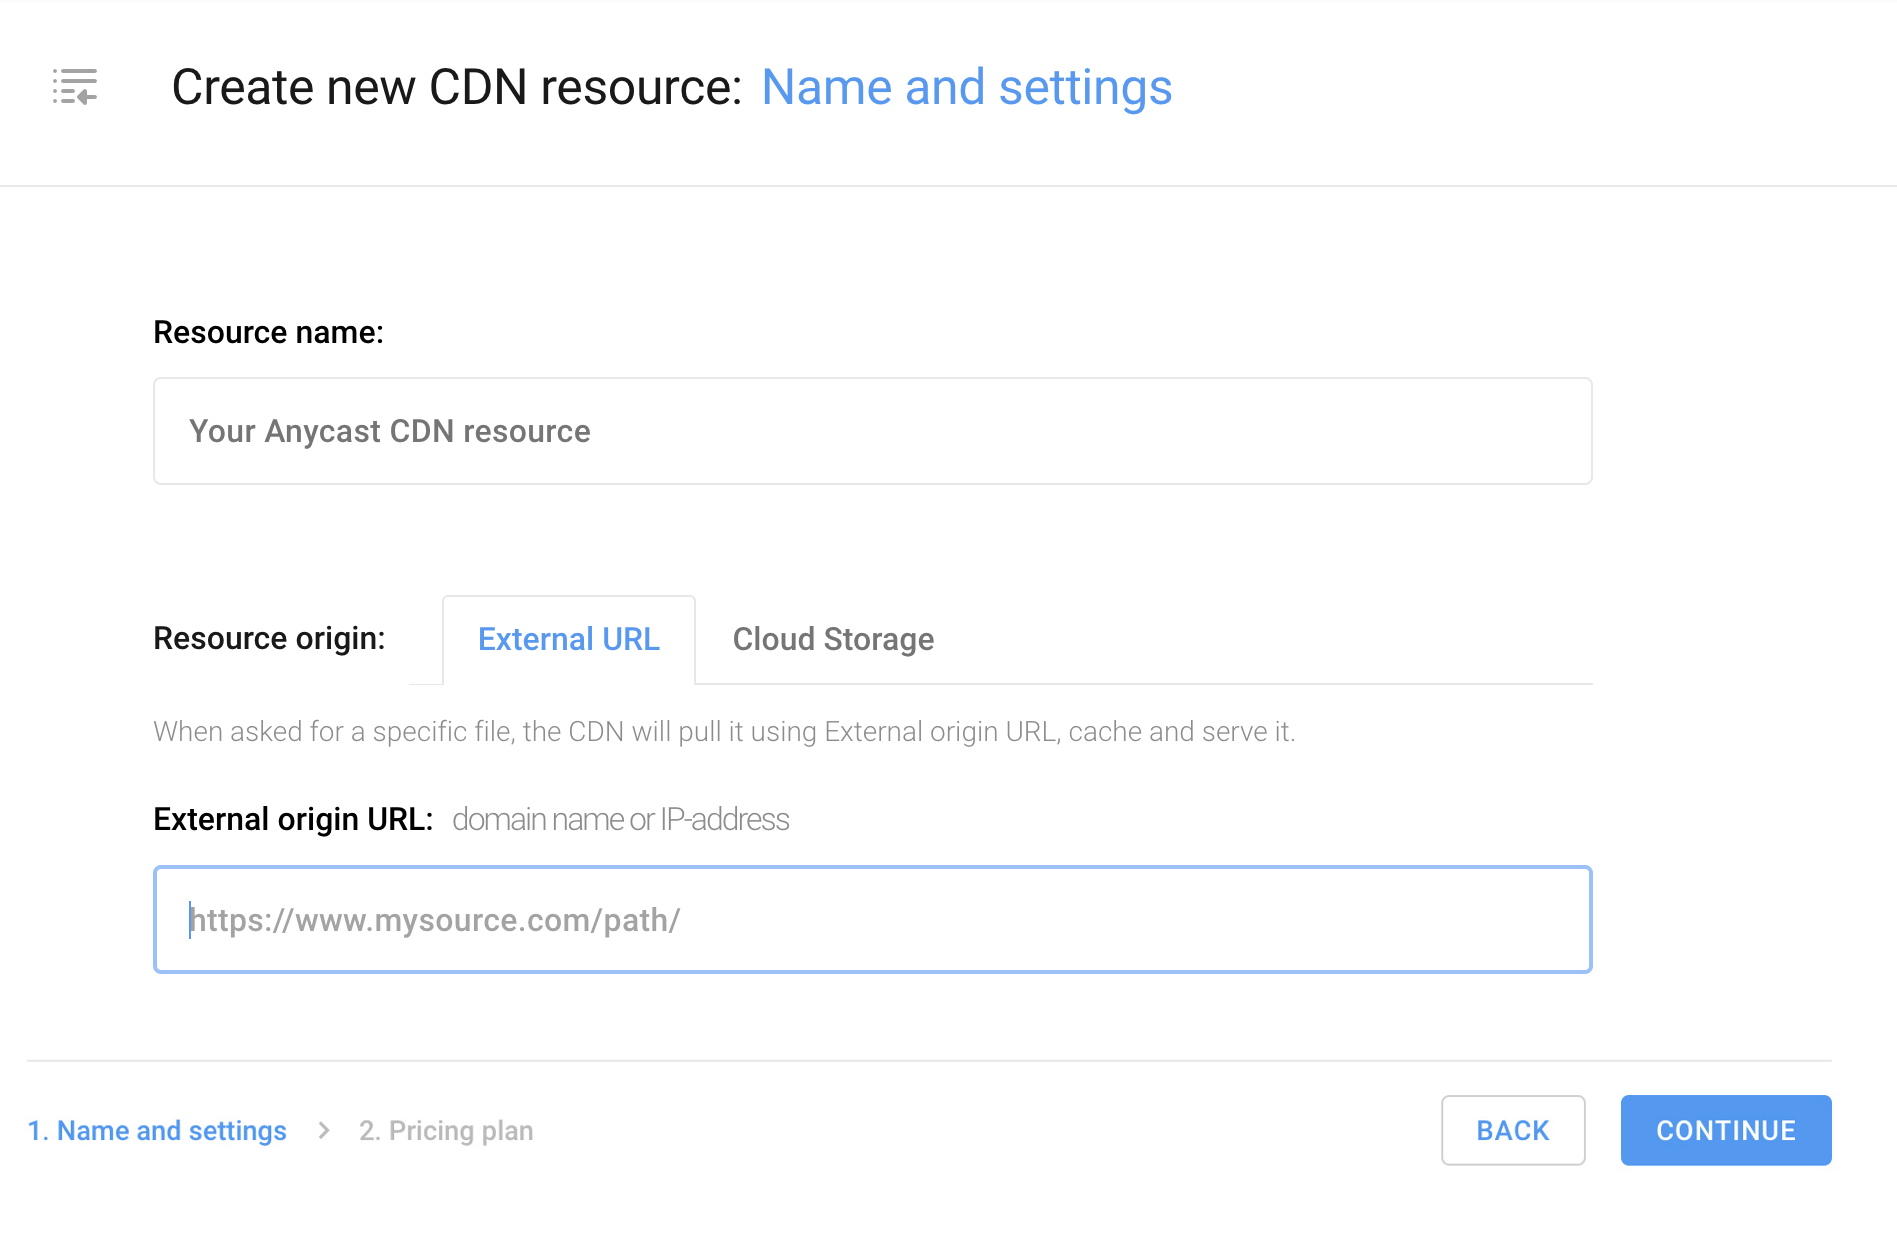
In the Create new CDN resource: Name and settings window that emerges, enter the Resource name of your choice and Resource origin in the corresponding fields. The directory name mustn’t contain spaces. Once completed, click Continue to proceed with creating your new resource.

¶ The Origin
The Origin (or the Source Server) — Your physical or virtual HTTP(S)-accessible server hosting the source directory with files you intend to distribute via the CDN, primarily designed to handle incoming requests. For example, the origin may host your website’s source code or content folders. Anycast CDN uses the source server to cache the original files and proxy requests for non-cached files.
¶ ☑ External source
As the Resource origin, on the External URL tab, you can specify the IP address or URL of the external storage, cloud or physical, hosted by you or third-party hosting, where the files you plan to distribute from anycast CDN are stored, as shown in the image above.
¶ ☑ AH Cloud Storage Source
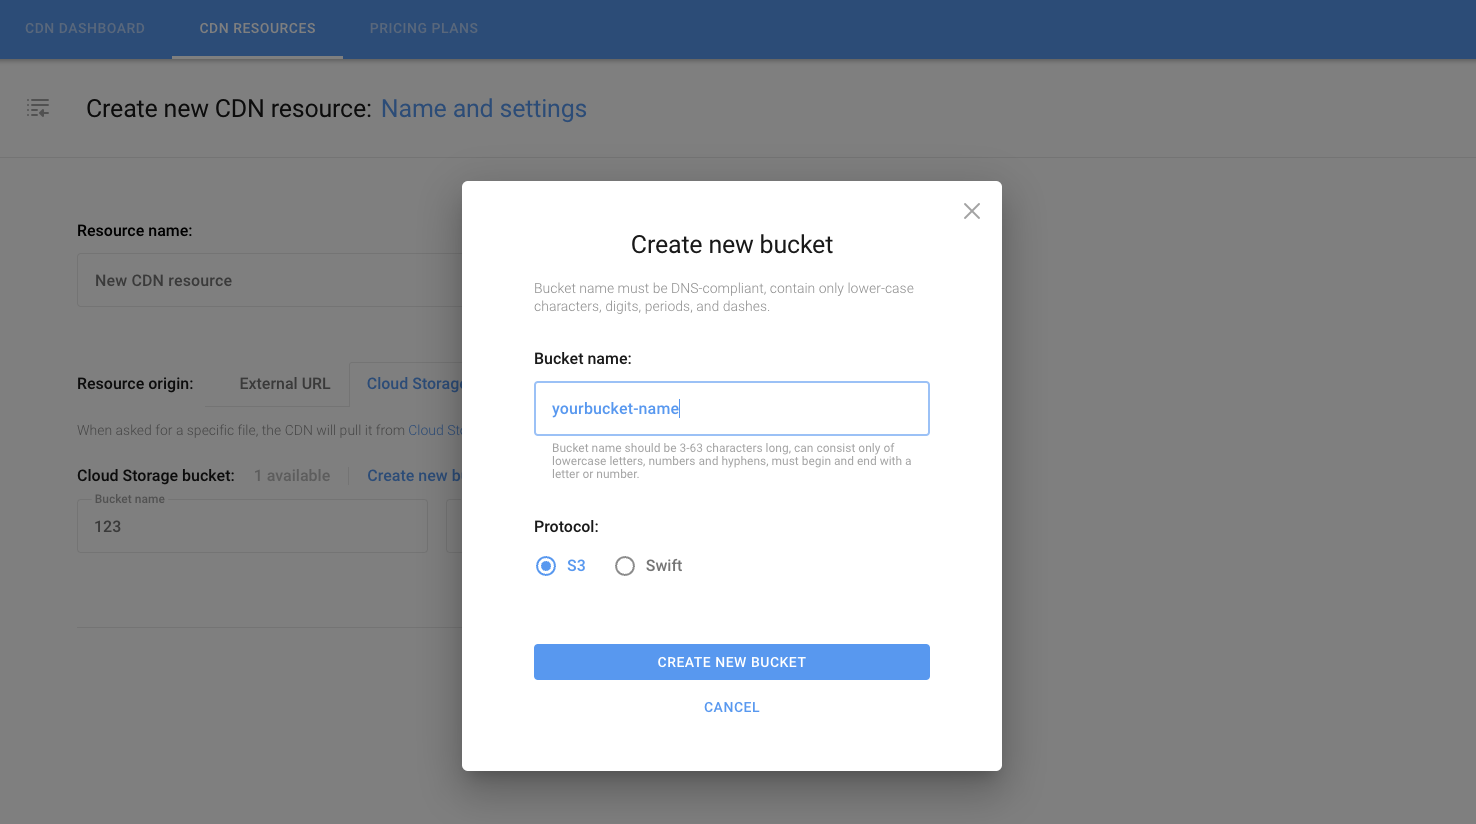
You can also create a bucket in our Cloud Storage and use it as a source. To do this, in the Resource origin section, click on the Cloud Storage tab and click Create new bucket. In the modal window that appears, as shown below, specify the name of your new bucket and your preferred protocol.

The name of your new bucket can be between 3 and 63 characters, consisting of lowercase letters, numbers, periods, and hyphens only..
To continue, click the Create new CDN resource button.
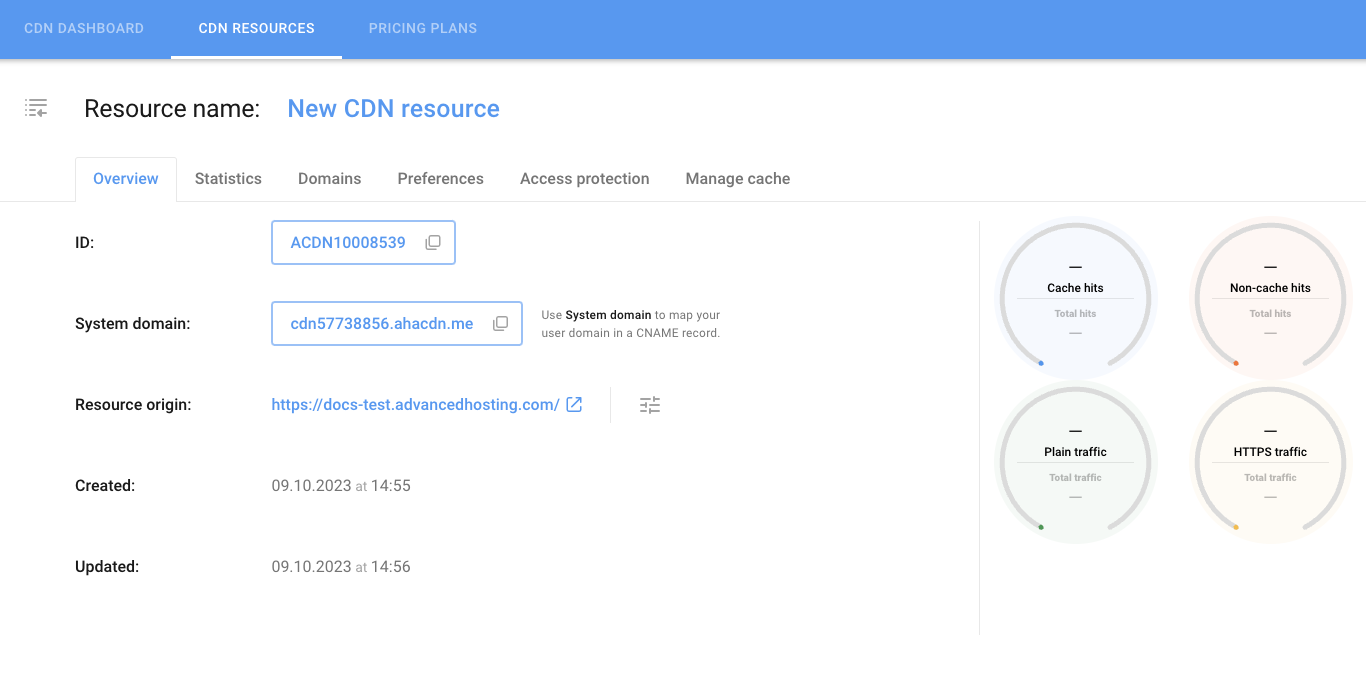
Your Anycast CDN resource will be created and you will see a new Anycast CDN resource overview page.

You can create and use as many CDN resources as you need.

¶ Resource list view
To view data about all your Anycast CDN resources, go to the Anycast CDN resources page on the top navigation bar of the section. In a separate row for each resource, the following information is available in the form of a table:

- ID — internal resource identifier
- Resource name — resource name
- User domains — domains you have created manually to access the resource files
- Resource origin — folder for storing the resource files
- State — current status of each resource
- Last modified — the date when the resource was last updated
This table displays data on CDN resources that have already been created. If you have not added any resources yet, on the CDN resources tab you can create your first CDN resource.
¶ Edit your resource
To change the resource name, go to the CDN resources section. The table view contains all of your CDN resources.
Hover your cursor over the Resource row; an edit icon will appear next to the Resource name:

Click the edit icon, and change the name of the Anycast CDN resource in the field that opens.
Name editing is also available on the resource page. To do this, at the top of the resource page, click on the resource name and change it.
¶ Resource deletion
To delete a Video CDN resource, go to the CDN resources page of the Anycast CDN section. In the table where all resources are listed, hover over the row of the desired resource. The delete icon will appear on the right side of the row:

Confirm the deletion by clicking the Delete button in the dialog box or click Cancel to abort the deletion.
It is also possible to delete a resource on the resource page. To do this, at the top of the page, point and click on the resource’s name and perform the desired action.
You can delete several Anycast CDN resources at once. To do this, select the desired resources using the checkboxes on the left side of the table of your resources, as shown in the figure below.
