Video CDN Resource Management
You can manage all of your Video CDN resources in a consolidated section:
¶ Create a new Resource
If you want to add one or more more domains to the CDN, create a new Video CDN resource. To do so, click the Create new Video CDN resource button in the lower right corner of the page:

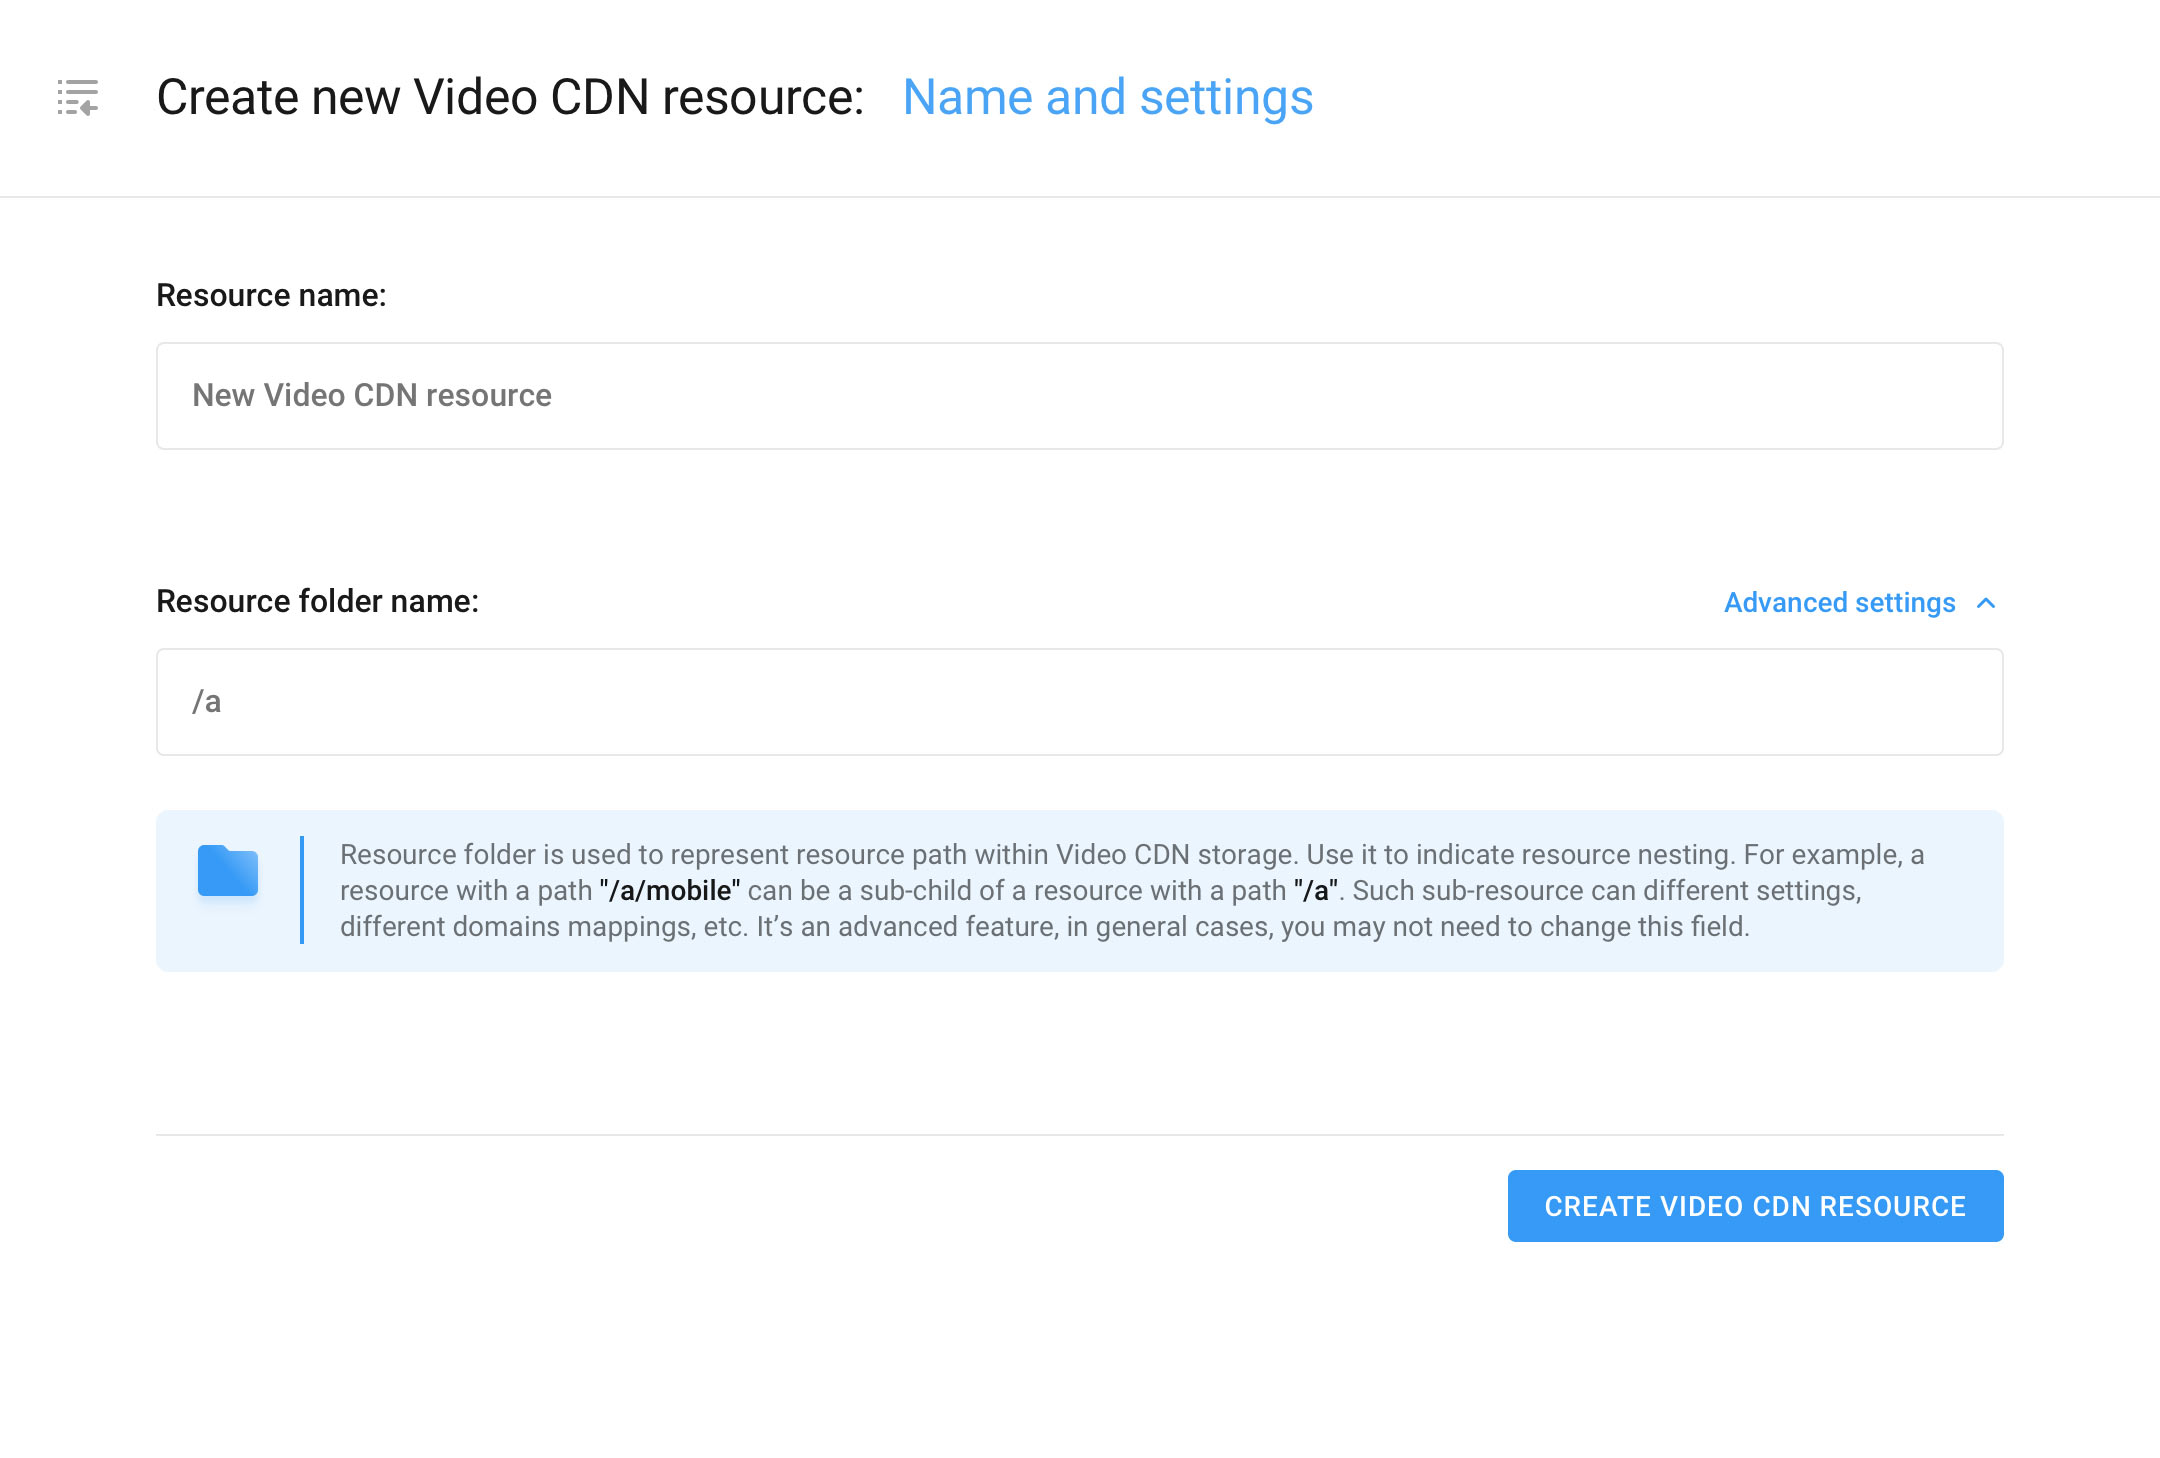
In the Create new Video CDN resource: Name and settings window that opens, enter the Resource name and Resource folder name of the Video CDN resource in the corresponding fields. The names are arbitrary; the folder name must not contain spaces.

To continue, click the Create new Video CDN resource button.
Your Video CDN resource will be created, and you will see a new Video CDN resource overview page.
To get started setting up your new Video CDN resource, import at least one file from your source that you will distribute using the CDN.
To add files, you must set up at least one of the ways to import files into the CDN. When you go to the Video CDN Resource Overview page, you will see a warning to this effect.

To add files that you want to distribute using the CDN, configure at least one of the file import methods in the CDN:
- Auto Import (go to auto import settings)
- Proxy (go to proxy settings)
You can create and use as many Video CDN resources as you like
To return to the list of all Video CDN resources, click the navigation button at the top of the resource page.

¶ View your Resources
To view data about all your Video CDN resources, go to the Video CDN resources page on the top navigation bar of the section. In a separate row for each Resource, the following information is available in the form of a table:

- ID - internal identifier of the Resource
- Resource name - resource name
- User domains - domains you manually create to access the resource files
- Resource folder - the folder where the resource files are stored
- Creation date - The date the Resource was created.
This table displays data on already created Video CDN resources. If you have not added any resources yet, you can create your first Video CDN resource on the Video CDN Resources tab.
¶ Rename a Resource
To change the name of a Video CDN resource, go to Video CDN resources - the table shows all your Video CDN Resources.
Hover your cursor over the row of the desired Resource, and the edit icon will appear next to the Resource name:

Click the edit icon to change the Video CDN resource name in the field that opens:

Name editing is also available on the resource page. To do this, at the top of the page, hover over the resource name and click it to edit.

¶ Delete resources
Note that when you delete a resource, the corresponding files will be deleted from the storage servers.
To delete a Video CDN Resource, go to the Video CDN Resources page of the Video CDN section. Hover over the row of the relevant resource in the table where all resources are displayed. The delete icon will appear on the right side of the row:

Confirm the deletion by clicking the Delete button in the dialog box, or click Cancel, to cancel.

Deleting a resource is also possible from the Resource page. To do this, hover over the resource name at the top of the Resource page and hit the deletion pictogram.

To simultaneously delete multiple resources, mark the relevant resources’ checkboxes at the left side of the resource list, as depicted below, and press Delete Resources.
