Video CDN Quickstart Guide
To start instantly distributing your content via the Video CDN, log into your user panel account* and create your first resource in 3 easy steps:
Don’t yet have an account? Contact our team right away!
¶ Name your resource
Upon logging into the user panel, select the Video CDN section in the navigation panel on the left side of your screen. You’ll be taken to new Video CDN resource creation page.
.png)
Enter the Resource name in the corresponding text field to identify your resource.
Add the Resource folder name, representing a path to your resource within Video CDN storage. Folder names must not contain spaces. Use “/” for folder nesting.
Click Create your Video CDN Resource button to confirm.
At this point, you will be asked to undergo the file import set-up. It is crucial to configure at least one file import method right away to start using Video CDN.
¶ File Import Set-up
Upon clicking Create your Video CDN Resource button, your resource is created and associated with selected folder, and you are taken to the file import set-up page.
.png)
You are presented with to import configurations Storage Sync or Lazy Import.
Storage Sync. Files will be fetched into Video CDN storage using Rsync or Swift;
Lazy Import. Files will be proxied from external URL on the first request and then uploaded to the Video CDN storage.
¶ Select the Tariff
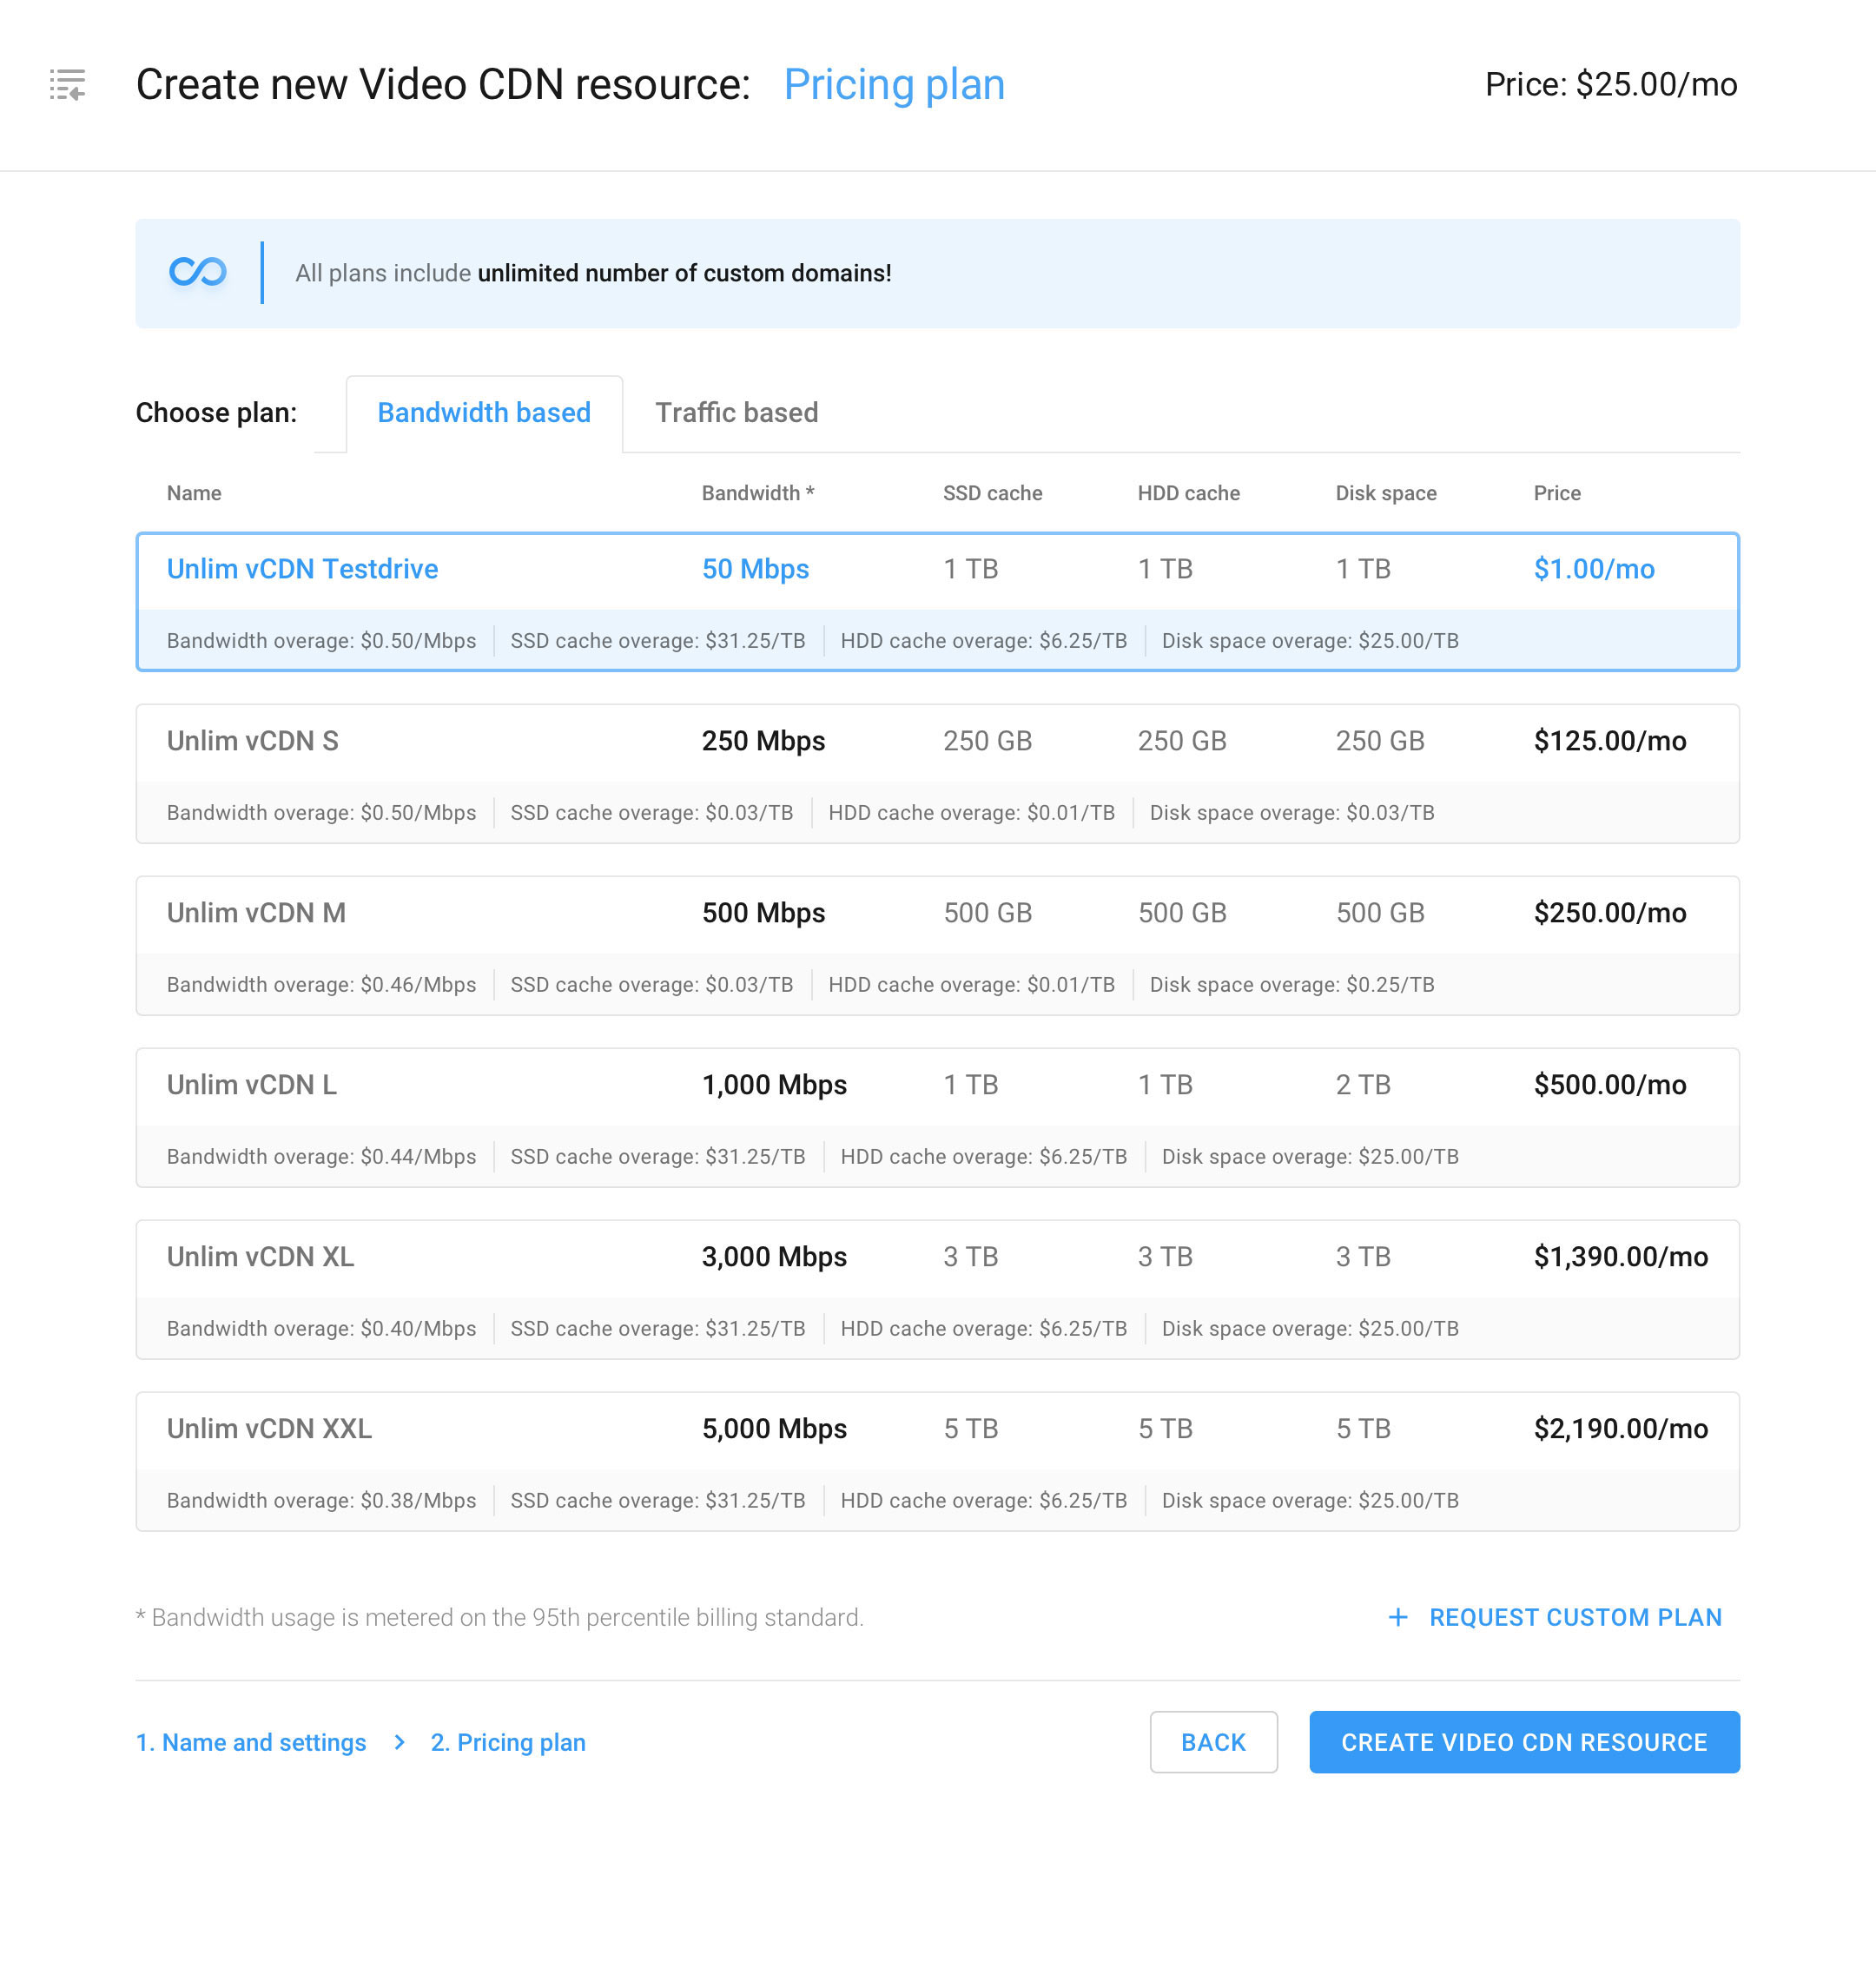
When verified, upon clicking Continue after creating your resource and folder, you will be taken to the Tariff section to choose a pricing plan.
The pricing chart is divided into two tabs:
Bandwidth-based tariffs are pricing plans determined by the bandwidth you require. Bandwidth is calculated by the 95th percentile method or your monthly average, metered in megabits per second (Mbps).
Traffic-based tariffs are pricing plans dependent on the amount of traffic you get. Traffic is measured in terabytes (TB) and billed based on factual usage.

If you are unsure which tariff plan suits you best, you can start with the first one offered in the chart of tariffs and switch to a more appropriate pricing plan after analyzing your first month’s consumption.
Storage and cache volumes are set for each tariff, in addition to bandwidth or traffic. Charges for resources used over your pricing plan are listed under each tariff.
.jpg)
If none of the ready-made tariffs are suitable for your project, request a custom tariff.
Once you have selected the suitable tariff, click the Create Video CDN resource button at the bottom right of your screen.
¶ Resource Overview Page
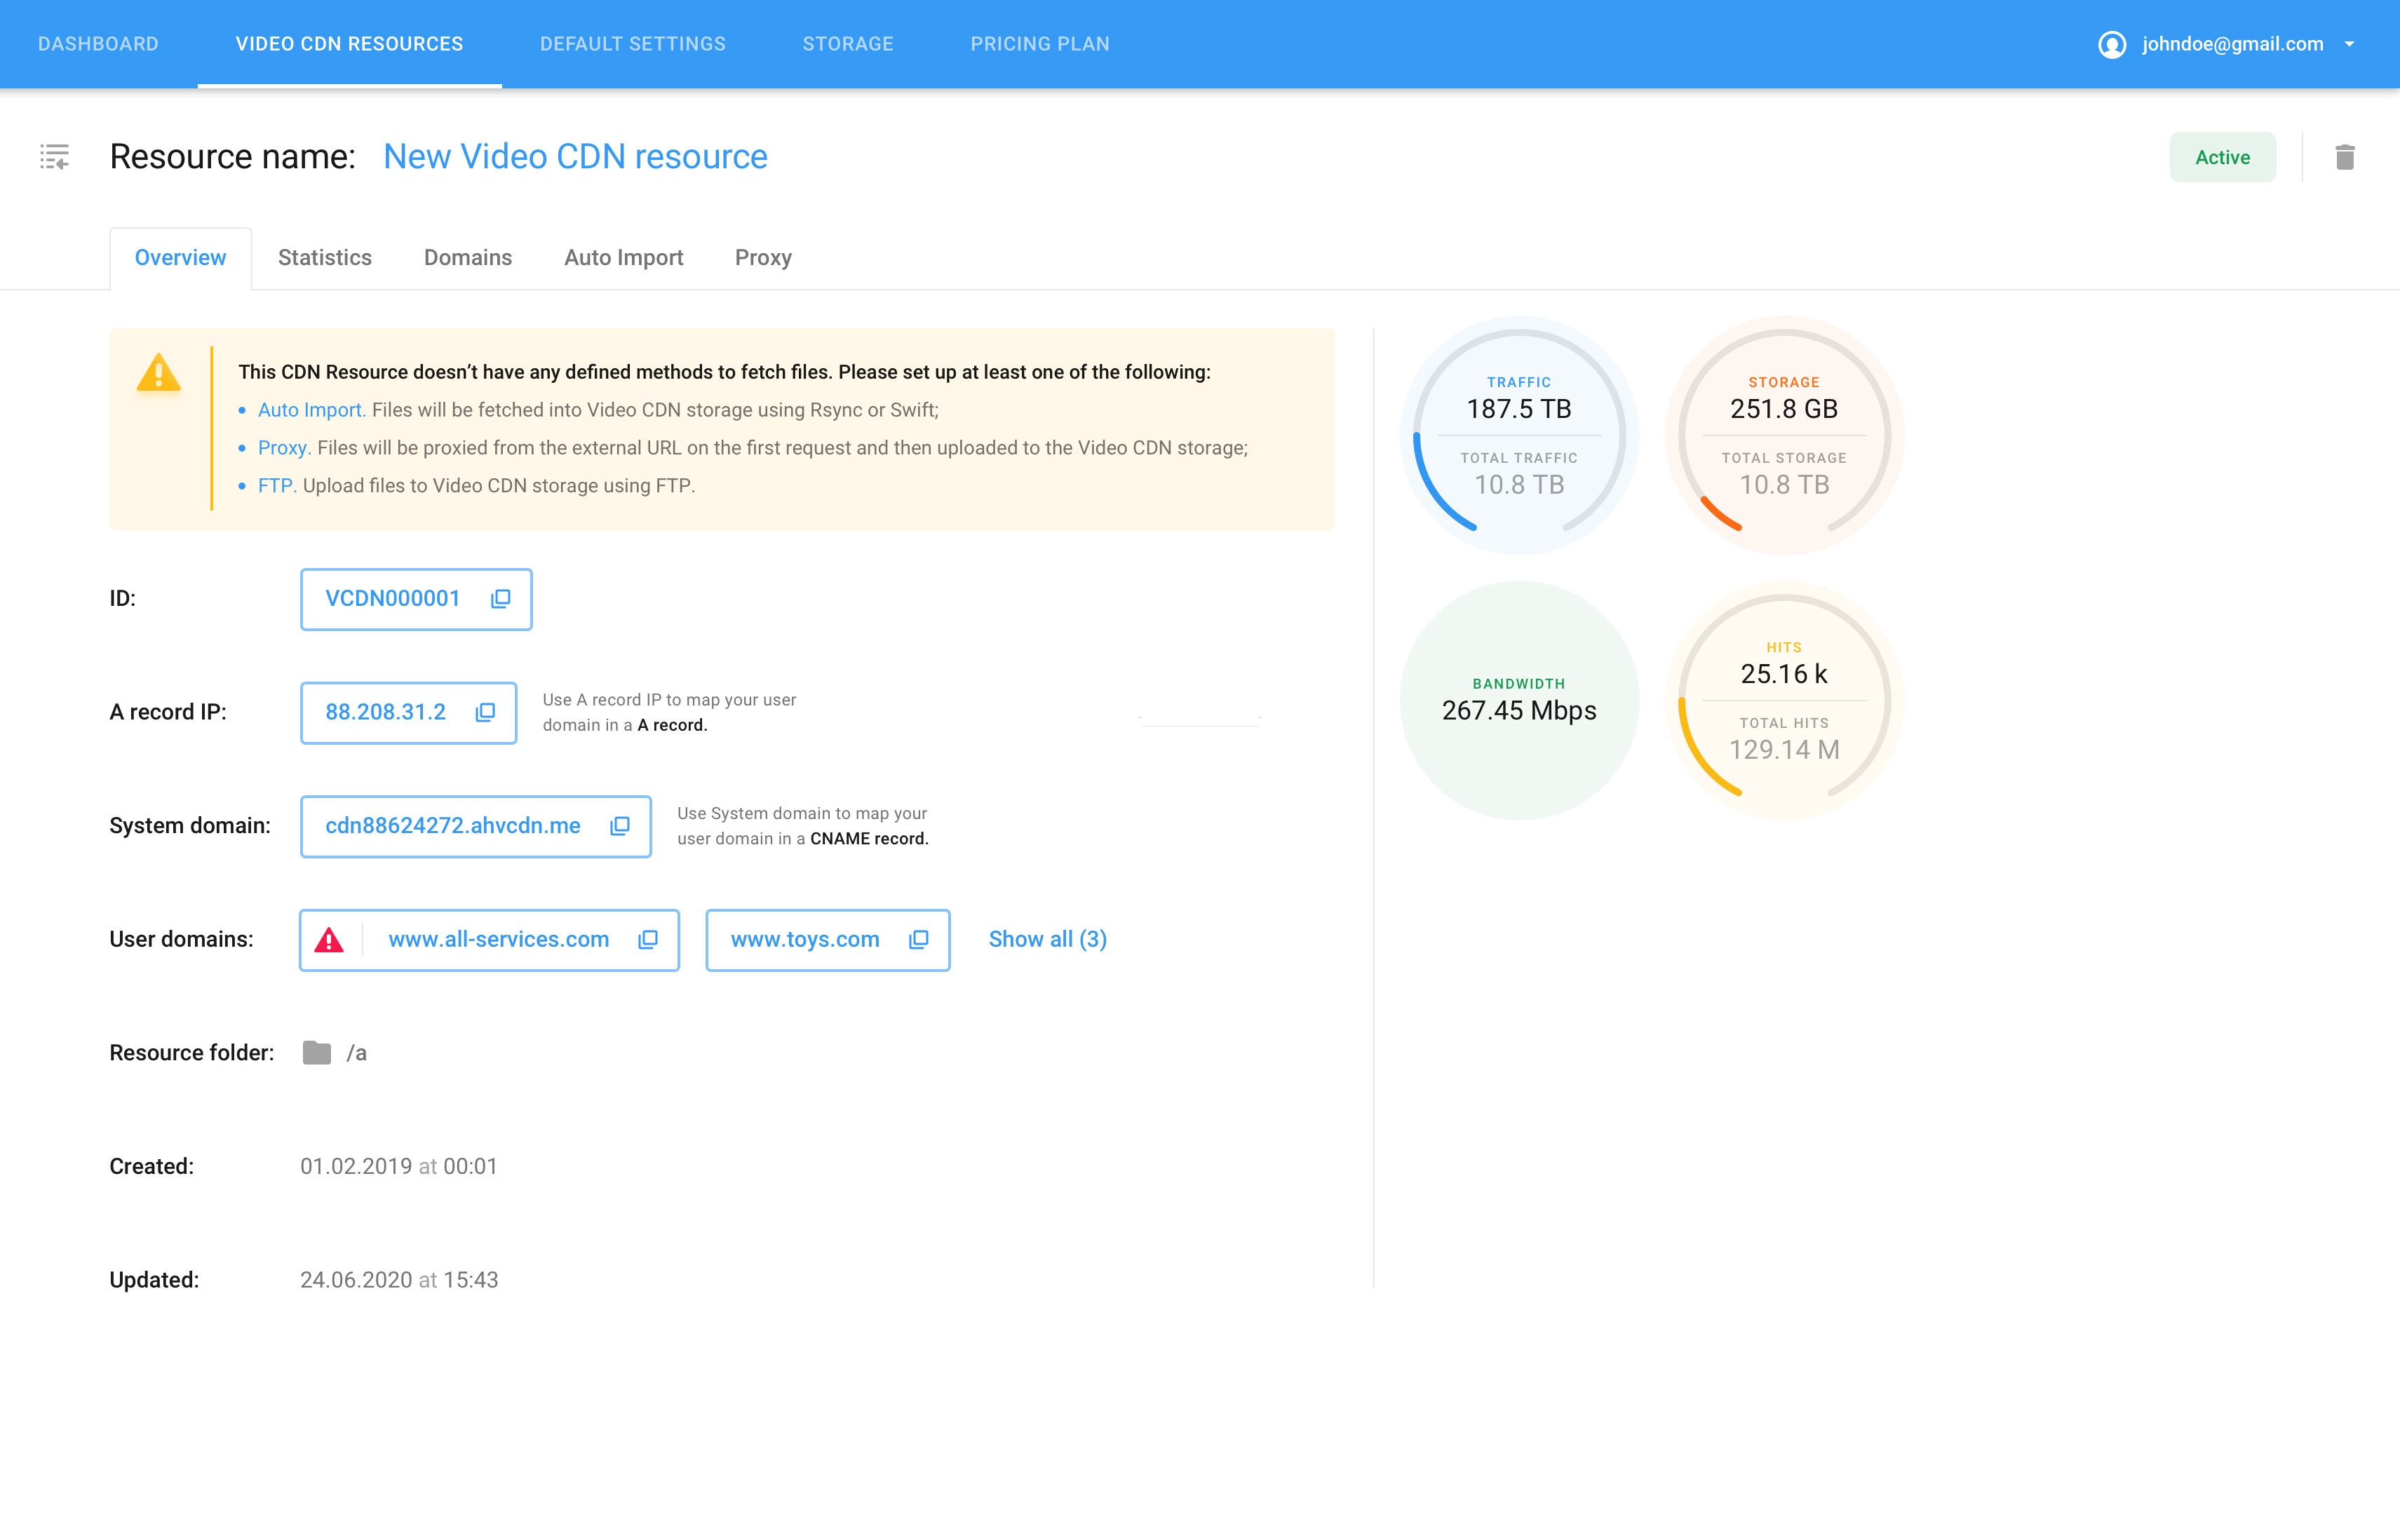
This will take you to the Overview page of your new CDN resource within the Video CDN Resources section, where you can configure and track all of your Video CDN resources when you fully set up and start using the CDN.
Please note, for Video CDN to function, it is crucial to set up auto-import for your files or have them proxied.
