Video CDN File Import
¶ File Import basics
Ensuring reliable storage and high availability of your content, Video CDN imports and maintains at least three copies of each file at geographically distributed locations. Based on dynamic monitoring, additional copies are created for popular files at the most frequently requested locations, and redundant copies are removed for less popular ones.
Content is made available to your users from the moment the first copy of the file is successfully imported by the CDN. Under normal circumstances, a video will be accessible within 5 minutes of being added to the CDN import queue.
To ensure that all of your files are available in the CDN as quickly as possible, when you first butch-upload multiple resources or add large amounts of content while using the CDN, we can temporarily triple the speed of content upload to the CDN by lowering the the initial file copy quantity to one copy per file, which will also reduce the immediate load on your origins. To arrange for this, contact our tech support.
You can set up file import within the Websa user panel. Video CDN currently supports HTTP(S) file import and HTTP autoimport from our Cloud Storage via S3 or Swift protocol.
With the API you can utilize FTP and rsync file import protocols as well. Follow the link for Video CDN API documentation.
¶ Storage sync
Use this method for further HLS streaming, to leverage multiple content sources, and in other cases requiring the mandatory file presence in the storage.
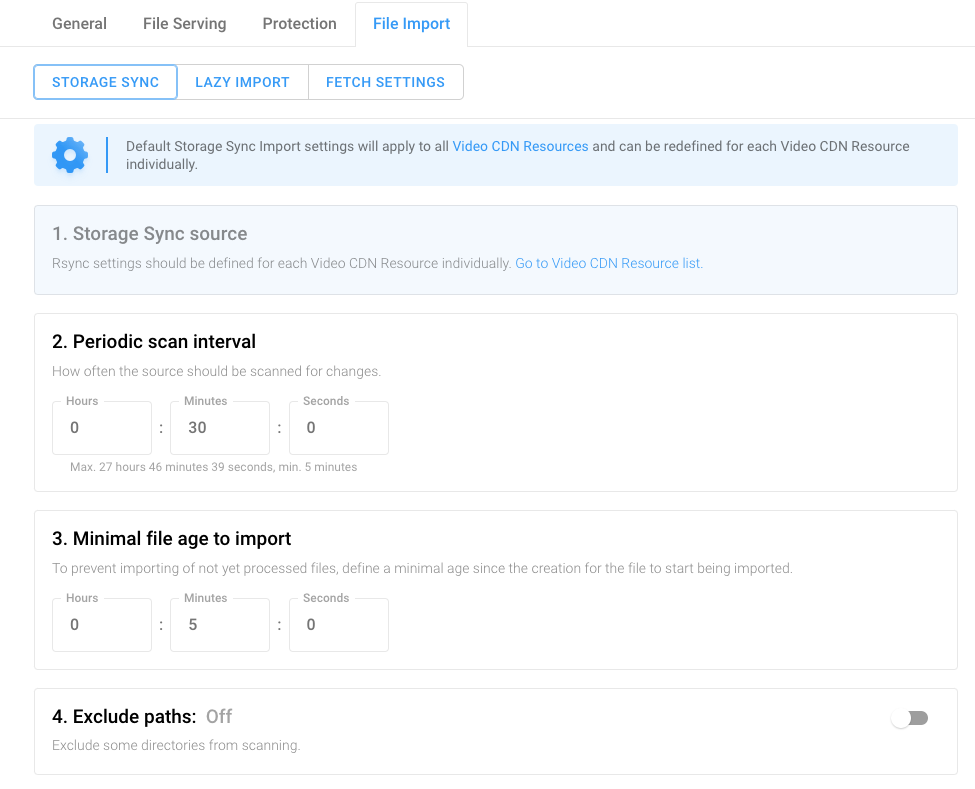
On the File Import tab, select Cloud storage as the import source. Click “Create New Bucket,” as shown below.

Specify the bucket name (without spaces and special characters), select the protocol type, and click “Create new bucket” in the modal window.

In the new bucket settings window, you can optionally name the new bucket folder, as well as remove folders from the file path by moving the corresponding toggle, as shown in the image above.
You also have access to additional settings for scanning frequency, minimum age of the imported file, and excluding certain folders from the scan for auto-import, as pictured below:

Fetch settings are not available for Auto Import from the Cloud storage.
¶ Lazy import
¶ Initial resource creation
Upon initial resource creation it is necessary to set up file import method.

¶ Rsync
Rsync (Remote Sync) is a fast and efficient command-line utility used for synchronizing files between local and remote systems. It is suitable for managing a large number of files or automating file transfers to the CDN.
The Rsync tool compares file timestamps and sizes between source and destination to transfer only changed files, reducing bandwidth usage. Reliable for bulk imports, supports incremental updates, and can handle large datasets.

¶ Swift
Swift refers to the OpenStack Object Storage service, which provides scalable storage solutions for large amounts of unstructured data, like videos.
Ideal for OpenStack cloud infrastructure for storage, allows for seamless integration with the CDN. You configure access to your Swift container, and the CDN imports the desired files.

¶ S3
S3 (Amazon Simple Storage Service) is a widely used object storage service offered by AWS (Amazon Web Services) that integrates well with our Video CDN as an origin. With your S3 bucket credentials, CDN fetches the video files and further distributes according to your CDN set-up.

Upon the S3 import type selection, as shown above, insert your S3 resource link in the following format:
s3://access_key_id:secret_access_key@domain/bucket_name[/folder]
Resource link consists of the following parameters:
Every link parameter is described below in the utmost detail, if you face any struggles applying the S3 import link - check syntax, parameter placement and examples below.
.png)
You can enter the enchanced editing regime by clicking the wrench pictogram to the right of the link, as depicted abowe. It allows you to check, how the link is interpreted per-parameter and make corrections if necessary.
.png)
Press “Save URL” if any corrections were made.
¶ S3 link parameters
All of the listed link parameters are mandatory except for the Folder.
¶ Protocol
Placement within the link: s3:// access_key_id:secret_access_key@domain/bucket_name[/folder]
Syntax:s3://
Function: Specifies resource being accessed in the S3-compatible storage via the S3 protocol.
Example use: s3://AKIAIOSFODNN7EXAMPLE:wJalrXUtnFEMI/K7MDENG/bPxRfiCYEXAMPLEKEY@s3.eu-west-1.amazonaws.com/my-bucket/videos
Resource link must not contain any other protocol, like
https://.
¶ Access Credentials
¶ Key ID
Placement within the link: s3://access_key_id:secret_access_key@domain/bucket_name[/folder]
Syntax:access_key_id
Function: A unique user identifier for the S3 resource access.
Example use: s3://AKIAIOSFODNN7EXAMPLE:wJalrXUtnFEMI/K7MDENG/bPxRfiCYEXAMPLEKEY@s3.eu-west-1.amazonaws.com/my-bucket/videos
¶ Key
Placement within the link: s3://access_key_id:secret_access_key@domain/bucket_name[/folder]
Syntax:secret_access_key
Function: The secret key paired with the access key ID to authenticate the user.
Example use: s3://AKIAIOSFODNN7EXAMPLE:wJalrXUtnFEMI/K7MDENG/bPxRfiCYEXAMPLEKEY@s3.eu-west-1.amazonaws.com/my-bucket/videos
¶ Domain
Placement within the link: s3:// access_key_id:secret_access_key @domain /bucket_name[/folder]
Syntax: @domain
Function: specifies your storage service endpoint. Might be @s3.amazonaws.com. for AWS, or any custom domain @custom-storage.com
Example use: s3://AKIAIOSFODNN7EXAMPLE:wJalrXUtnFEMI/K7MDENG/bPxRfiCYEXAMPLEKEY@s3.eu-west-1.amazonaws.com/my-bucket/videos
Domain must not contain any protocol, like
https://.
¶ Bucket Name
Placement within the link: s3://access_key_id:secret_access_key@domain/bucket_name[/folder]
Syntax:/bucket_name
Function: stands for your resource directory container in AWS.
Example use 1: s3://AKIAIOSFODNN7EXAMPLE:wJalrXUtnFEMI/K7MDENG/bPxRfiCYEXAMPLEKEY@s3.eu-west-1.amazonaws.com/my-bucket/videos
Example use 2: s3://AKIAIOSFODNN7EXAMPLE:wJalrXUtnFEMI/K7MDENG/bPxRfiCYEXAMPLEKEY@s3.eu-west-1.amazonaws.com/my-bucket
Next parameter (folder) is optional, if not included in your link, it should end with
/bucket_name
¶ Folder name
Placement within the link: s3://access_key_id:secret_access_key@domain/bucket_name /folder
Syntax:/folder
Function: defines the subdirectory containing your files within the bucket.
Example use: s3://AKIAIOSFODNN7EXAMPLE:wJalrXUtnFEMI/K7MDENG/bPxRfiCYEXAMPLEKEY@s3.eu-west-1.amazonaws.com/my-bucket/videos
Parameter is shown in braces as it is optional, when including a folder name - omit braces, stick to the
/folderformat.
¶ Cloud Storage
Cloud Storage refers to our on-house Cloud Storage or any general-purpose storage solutions provided by cloud platforms, such as Google Cloud Storage, Azure Blob Storage, or others.
Suitable for users leveraging cloud platforms other than AWS or OpenStack for storing their videos. The CDN integrates with the respective cloud platform, and you provide access to your storage container or bucket.
Cloud Storage is flexible and scalable for various cloud environments, depending on the provider’s features.

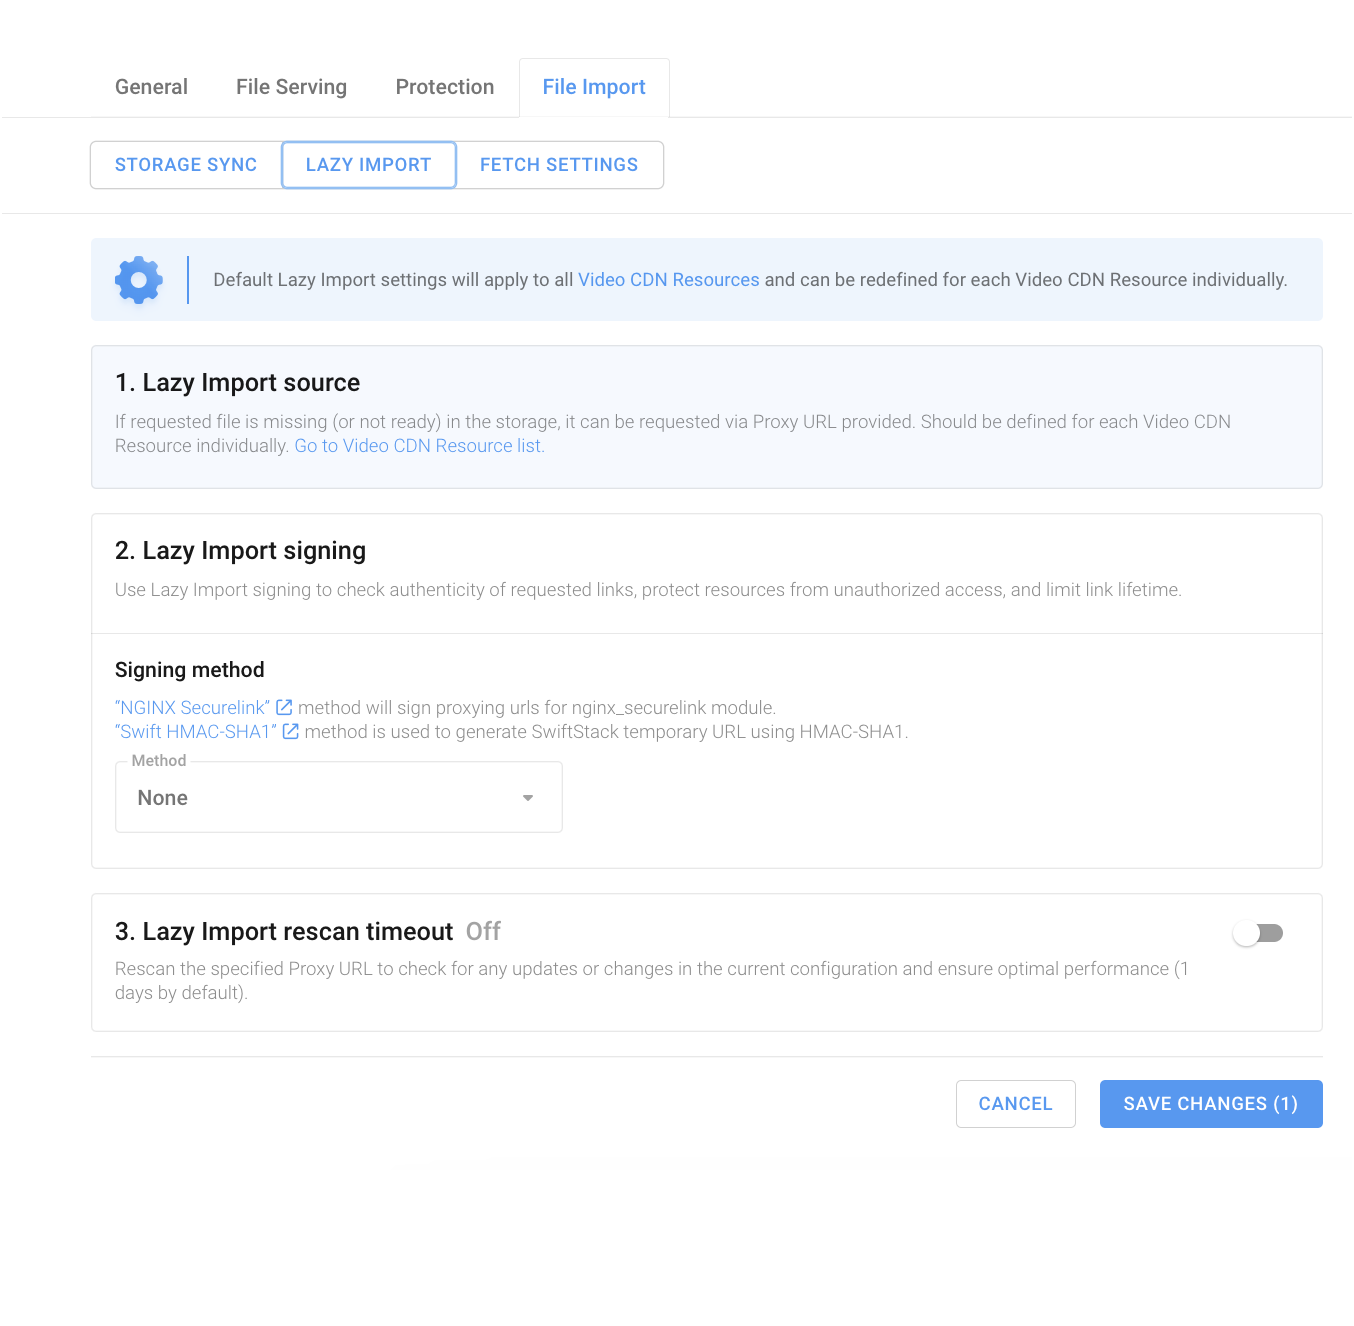
To configure files auto import, select the corresponding tab within either Default Settings, to apply to all of your CDN resources, or in File Import settings section of a certain resource:
By default, individual resource settings are linked with Default settings and correspondingly marked Linked with Default settings, as shown below.
.jpg)
To unlink any parameter from the default settings, click Linked with Default settings and make the required changes.
To restore the default setting, click on the Unlinked from Default settings state, and it will return to its default values.
Default settings are global settings, set in the Default settings and applied to all Video CDN resources created in your account.
¶ Import source
For CDN to process requests of missing (or not yet available) files, you can set up a proxy URL or a Cloud Storage link.
¶ Proxy URL
Assign an external proxy url for your resource, as shown on the picture below.
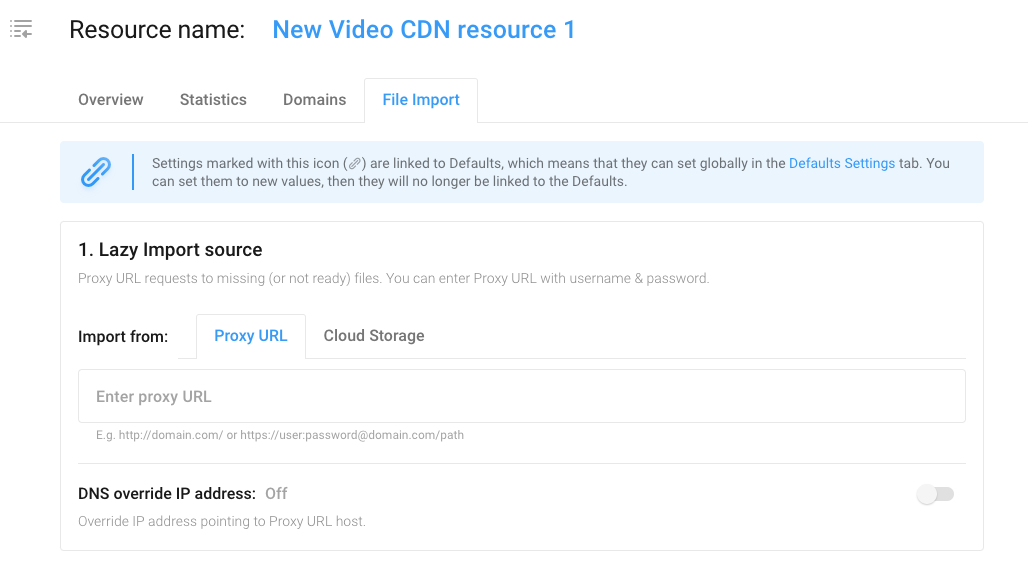
With the toggle you can also choose to override IP address pointing to Proxy URL host.
¶ Cloud Storage
With this option enabled, CDN will cache requeted file from your Cloud Storage bucket and serve it.
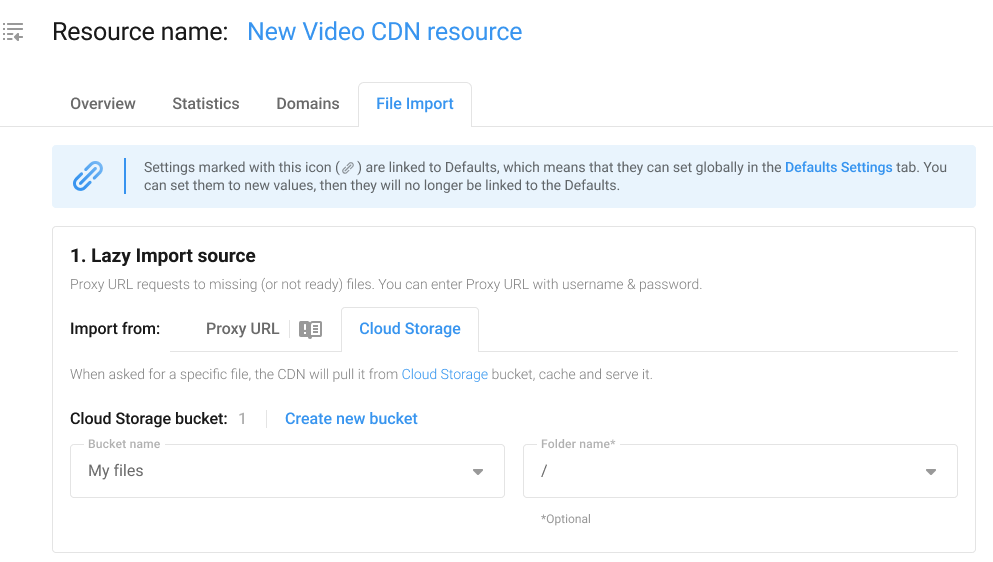
You can choose an excisting bucket from the dropdown list, or create a new one from this menu, clicking the Create New Bucket link.
Please note, the following settings - Lazy Import signing and Rescan Timeout - is not available if Cloud Storage is selected as your Proxy URL
¶ Recan Timeout
Set up the time period, within each CDN will check up for any updates or changes of your resources current configurations.
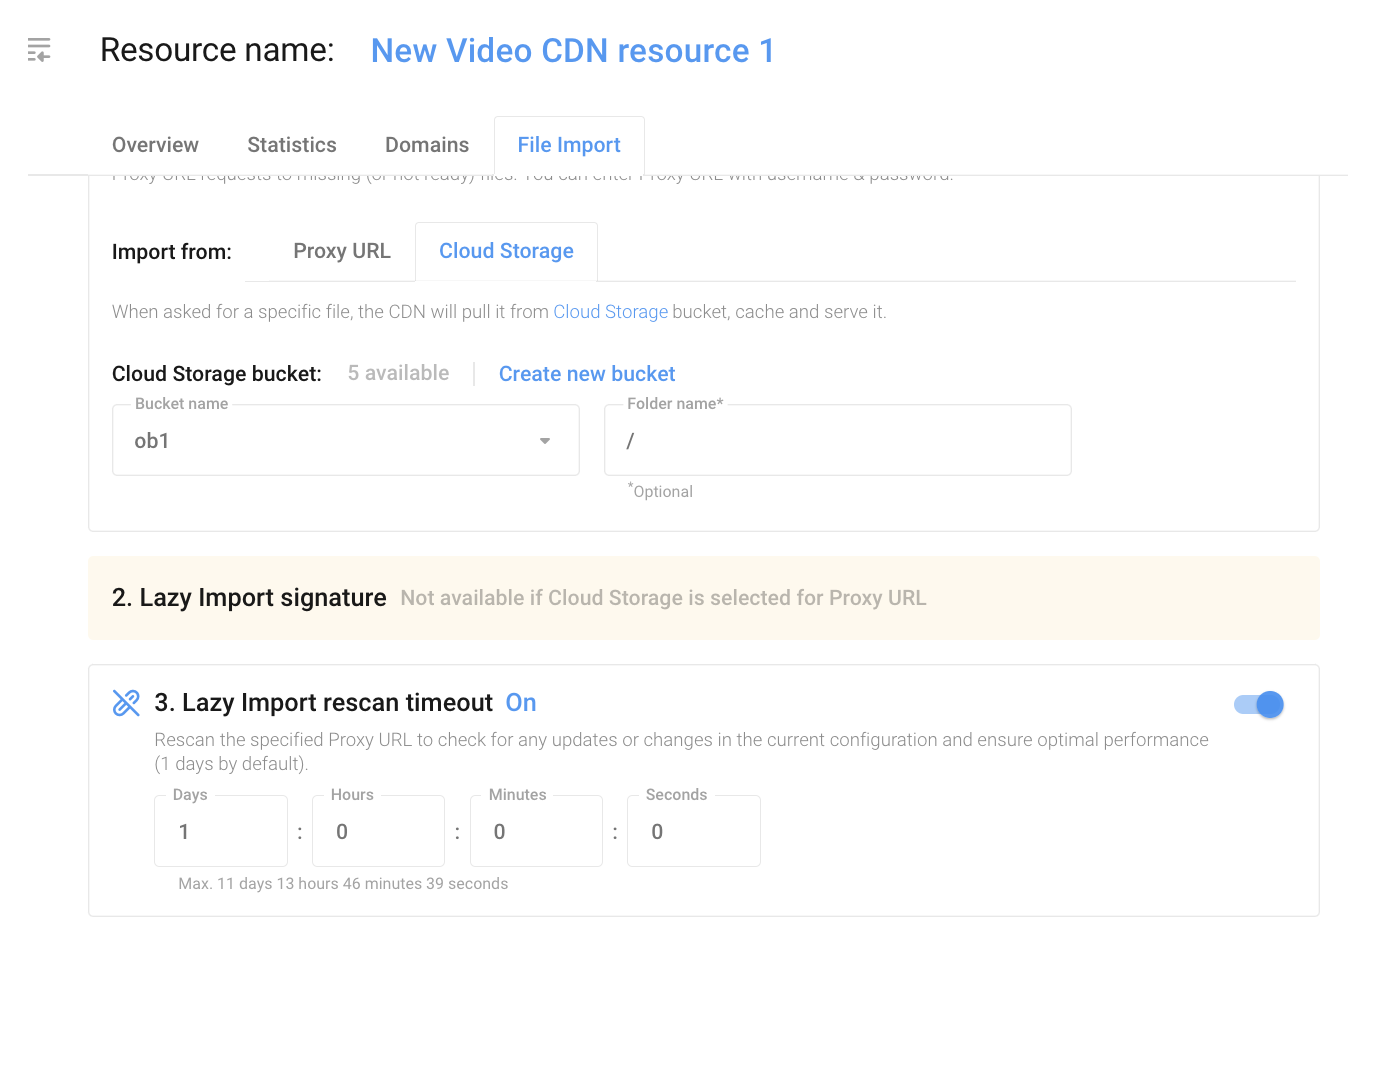
Disable if irrelevant, by moving the toggle into the inactive position.
¶ On-demand Import
Instead of pre-importing your content, you can configure the Video CDN to import files on demand. This type of import set-up is closer to the traditional cashing CDNs’ operation. In this mode, CDN only initiates file import when your file is requested for the first time.
Please note, CDN will start any activities in relation to file that’s abscent from the CDN, including checking its excistence on the origin and scheduling for import - only upon the first user request.
From the moment your file is first requested until it is fully imported, the CDN will forward requests to your source and will proceed to serve it directly once the first copy is fully uploaded to any storage server. The time until the file is fully uploaded into the CDN is typically less than 10 minutes.
This mode allows you not to bother with initial bulk file import and fully delegate this task to the Video CDN, but it poses the following limitations:
- You cannot apply media processing (such as video trimming) to files imported on demand.
- You cannot convert to HLS/DASH in this mode. Therefore, only video players utilizing pure HTTP(S) to retrieve content will be able to reproduce your content.
- If you update any file at your origin server, you need to re-import it to the CDN via the API. Otherwise, the CDN will continue distributing the initial version.
¶ Fetch settings
For each Video CDN resource on the Auto Import tab, you can set up Fetch settings (Settings for requests to other sources):
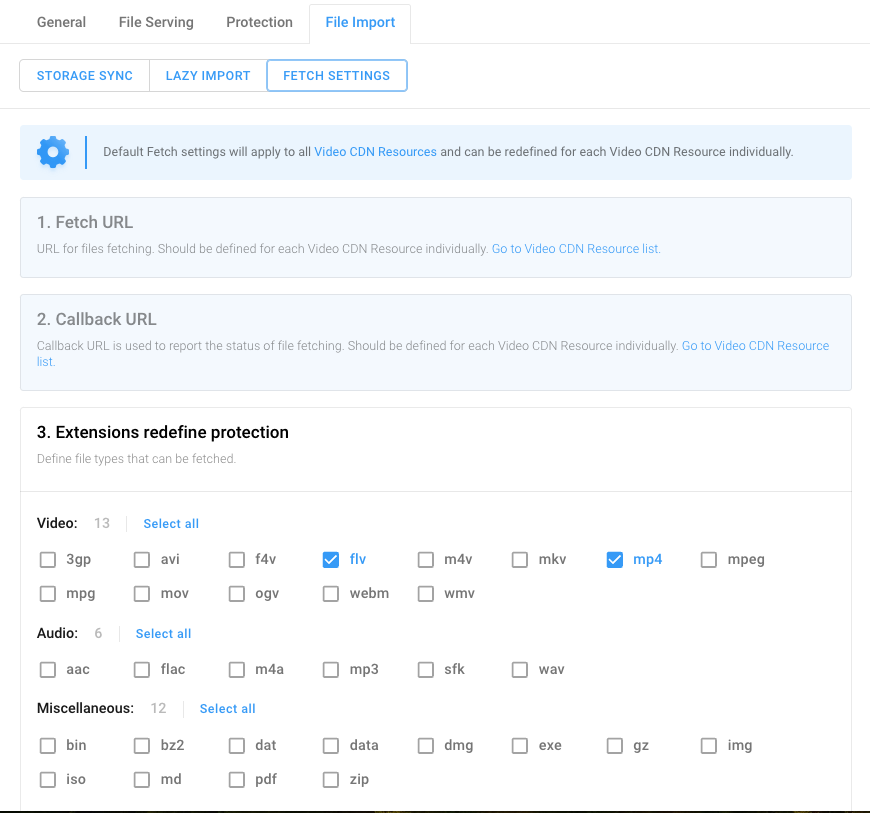
Fetch URL and Fetch URL signature settings are only available if Rsync URL or Swift URL is selected as Auto Import source for Cloud Storage option is unavailable!
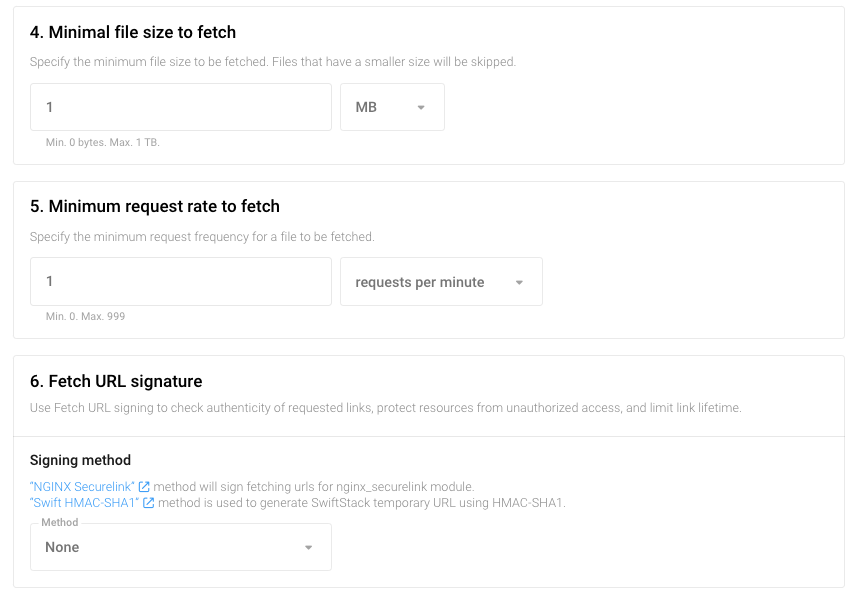
¶ Proxy Settings
In addition to providing the origin link, where the CDN will proxy requests for missing files until it finishes downloading requested files, you can also configure the following settings:
- Alternate files download URL (not proxying)
In case your origin server has a file upload speed limitation, we recommend creating a separate virtual host or location {} with no limitation and setting it as an alternate download URL to speed up file import. - Nginx_securelink token settings (if your origin is protected by the SecureLink Nginx module).
Since CDN does not disclose your origin’s URL anywhere and performs its own security checks - there is no need for nginx_securelink use on your origin server’s end, we recommend disabling it to eliminate potential file import issues. - Requests frequency to trigger the import. By default, import is initiated upon the first file request, but you can exclude infrequently requested files from auto import by setting a minimum number of requests per minute or a minimum interval in seconds between two requests to initiate the file import by the CDN. In this way, you can optimize costs by reducing the CDN storage used.
- Minimum file size to trigger the import
- The list of file extensions to be imported
- Templates to exclude certain files from import altogether. (Proxying will be applied to such files).
¶ Import Automation
To automate file import, we suggest using our script.
The script will scan a given content directory within your origin server, compare it with your content already available in CDN, and eliminate differences via API, adding files missing in CDN, reloading updated ones, or deleting those you have already deleted.
CDN is not required to fully synchronize with your directory - for instance, you can set it up to only add new and/or update changed files, but not to delete files that are already missing from your origin server.
¶ Auto Import with our script
¶ Import_files.pl script parameters
The script settings are defined in the config file; descriptions for all supported parameters can be found in the source code below or upon running it without parameters set. The script requires a login and a password to access Video CDN API - it can be configured in the Websa control panel.
You can configure a single directory processing with one config file. Use separate config files to configure multiple directories.
¶ Protocols
The script can scan not only the local folder but also network services supporting recursive folder listing; currently supported protocols are rsync://, swift://, and s3://.
¶ Download import_files.pl script
v. 22.06.29
39,7 kb
¶ Import with Rsync Daemon
- Run the Rsync daemon with the following configuration:
[some_string].
path = /home/client/videos.domain.com
comment = videos
list = false
secrets file = /etc/rsyncd/rsyncd.secret
auth users = some_user
(some_string is at your discretion and will be used as rsync-URL as shown below)
- Add the following entry to
/etc/rsyncd/rsyncd.secret:
some_user:some_password
(set the user and password instead of some_user and some_password)
- Set the value to 600 in
/etc/rsyncd/rsyncd.secret (chmod 600 /etc/rsyncd/rsyncd/rsyncd.secret). - Pass some_user:some_password values to tech support
and the rsync-URL in the following format:rsync://yourhost.example.com/some_string/orrsync://<IP>/some_string/
whereIPis the IP address of your host.
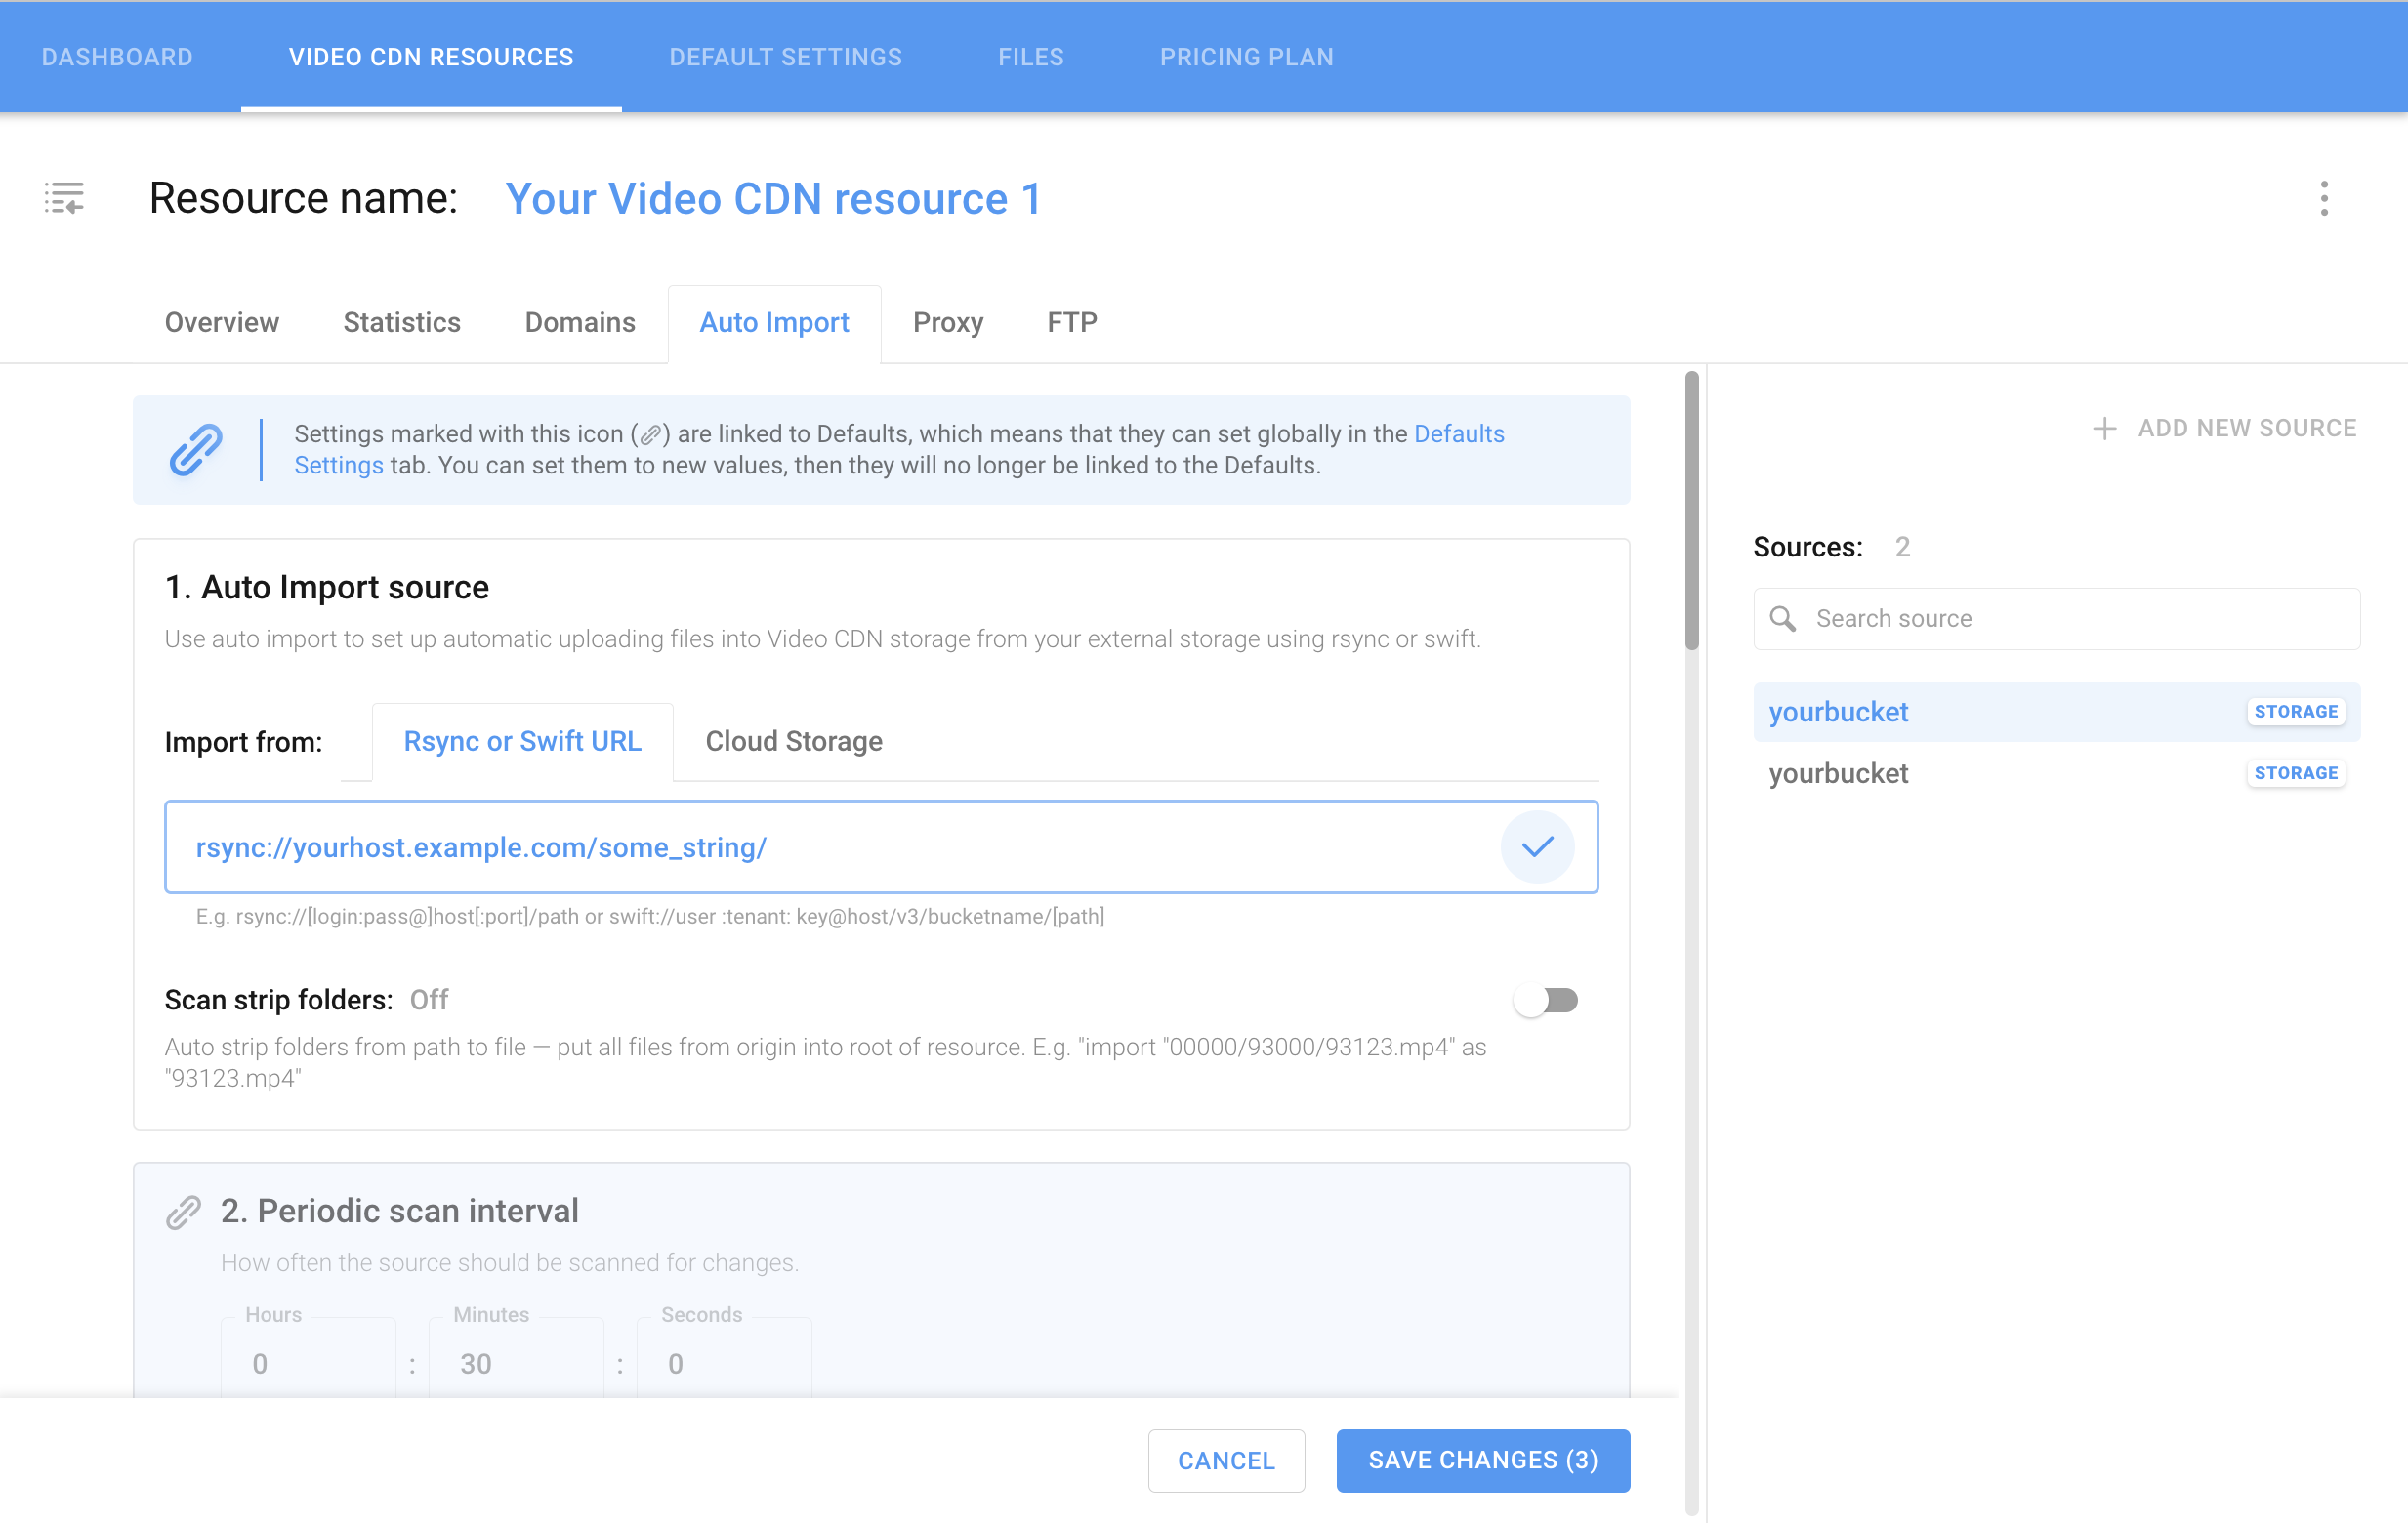
On the Rsync or Swift USR tab of the resource Auto import settings page, paste the rsync link into the corresponding field and hit the checkbox to the right to add the source, as highlighted in the image above.
¶ Proxy Set-up
When the import is configured on-demand (via Proxy), the first request for a file missing from the CDN is proxied to the origin. The initial request places the file in the download queue. After a while, the CDN downloads and starts distributing the file directly. A virtual HTTP host protected by a login and password can be used as an origin.
With this import mode, you don’t need to prefill the CDN with all files, but it is associated with increased traffic to your origin, especially at the very start of use.
The increase in traffic to your storage will depend on the overall traffic to your resources within the CDN.
When importing via HTTP-origin, you can set a limit on the total space taken up in the CDN (sum of file sizes excluding copies). If the limit is exceeded, copies will be deleted, starting with the least popular files until the below-limit volume is reached.
To configure file proxying, select the respective tab:
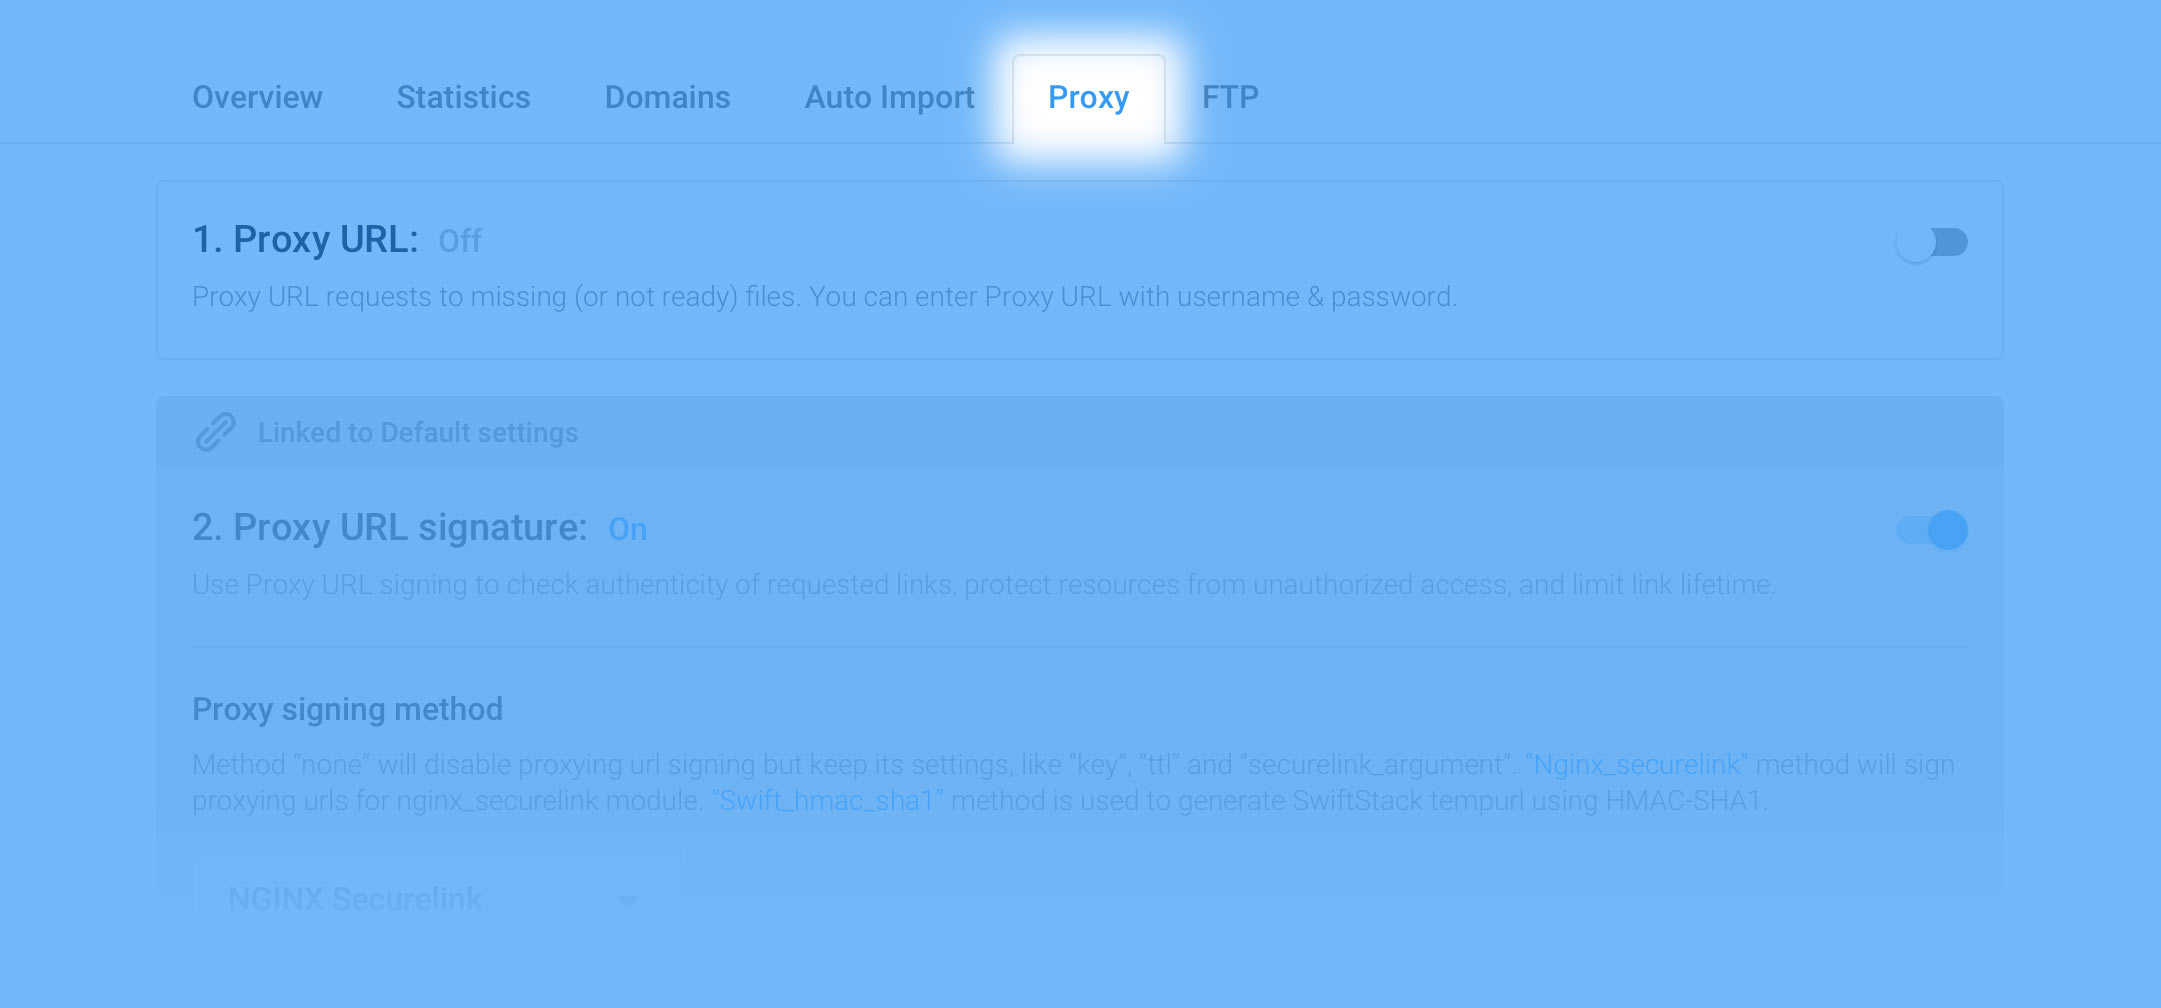
Resource proxying is disabled by default.
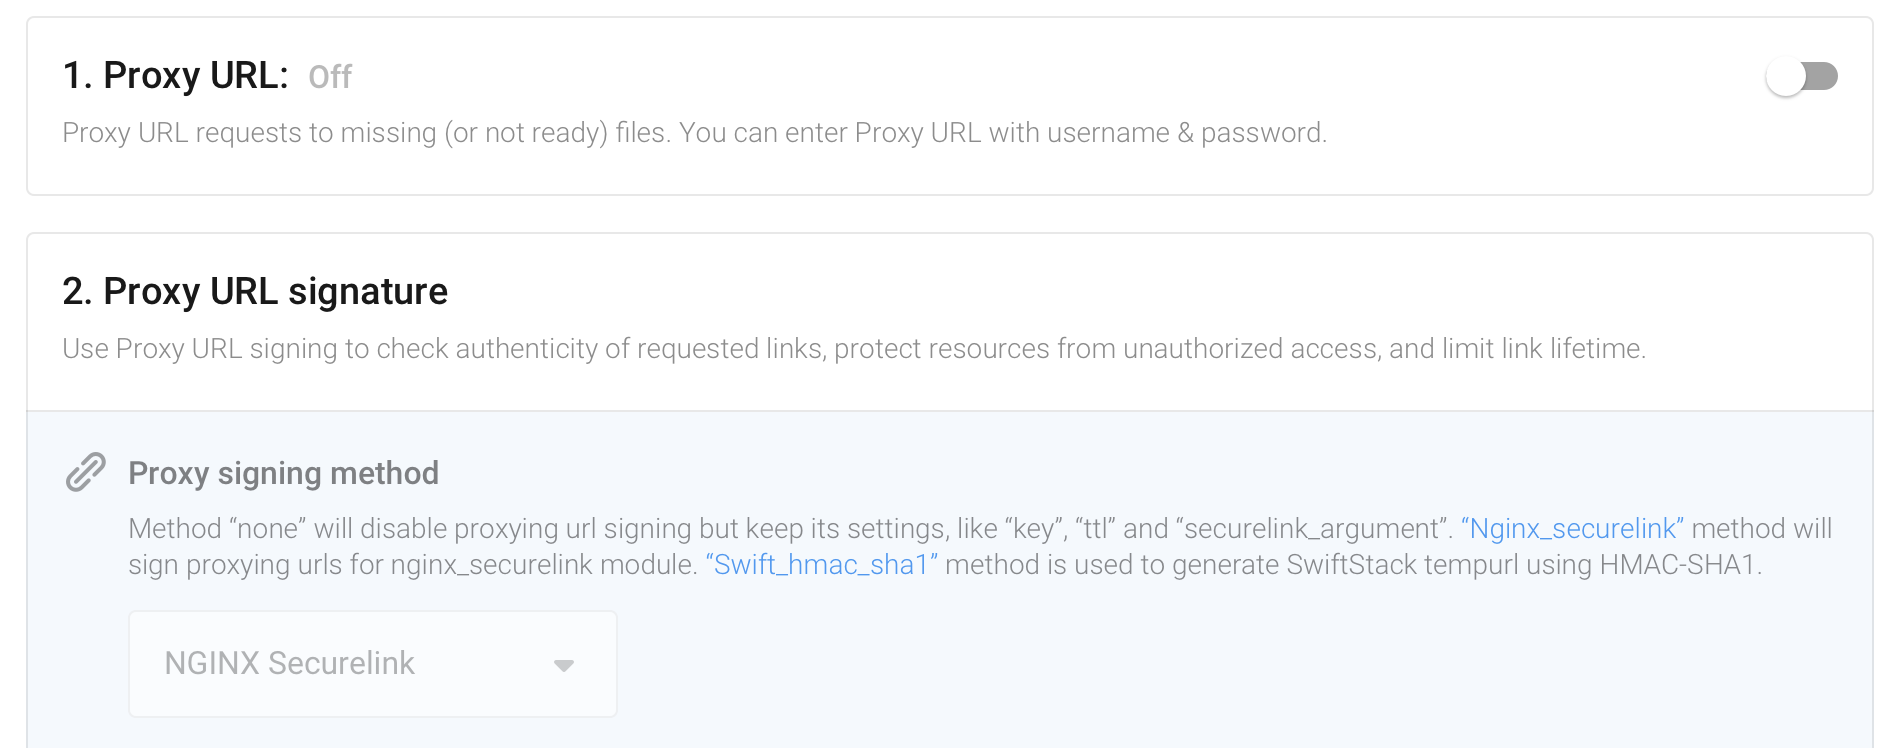
To view the customizable proxying resource settings, shift the toggle to the “on” state as shown below:
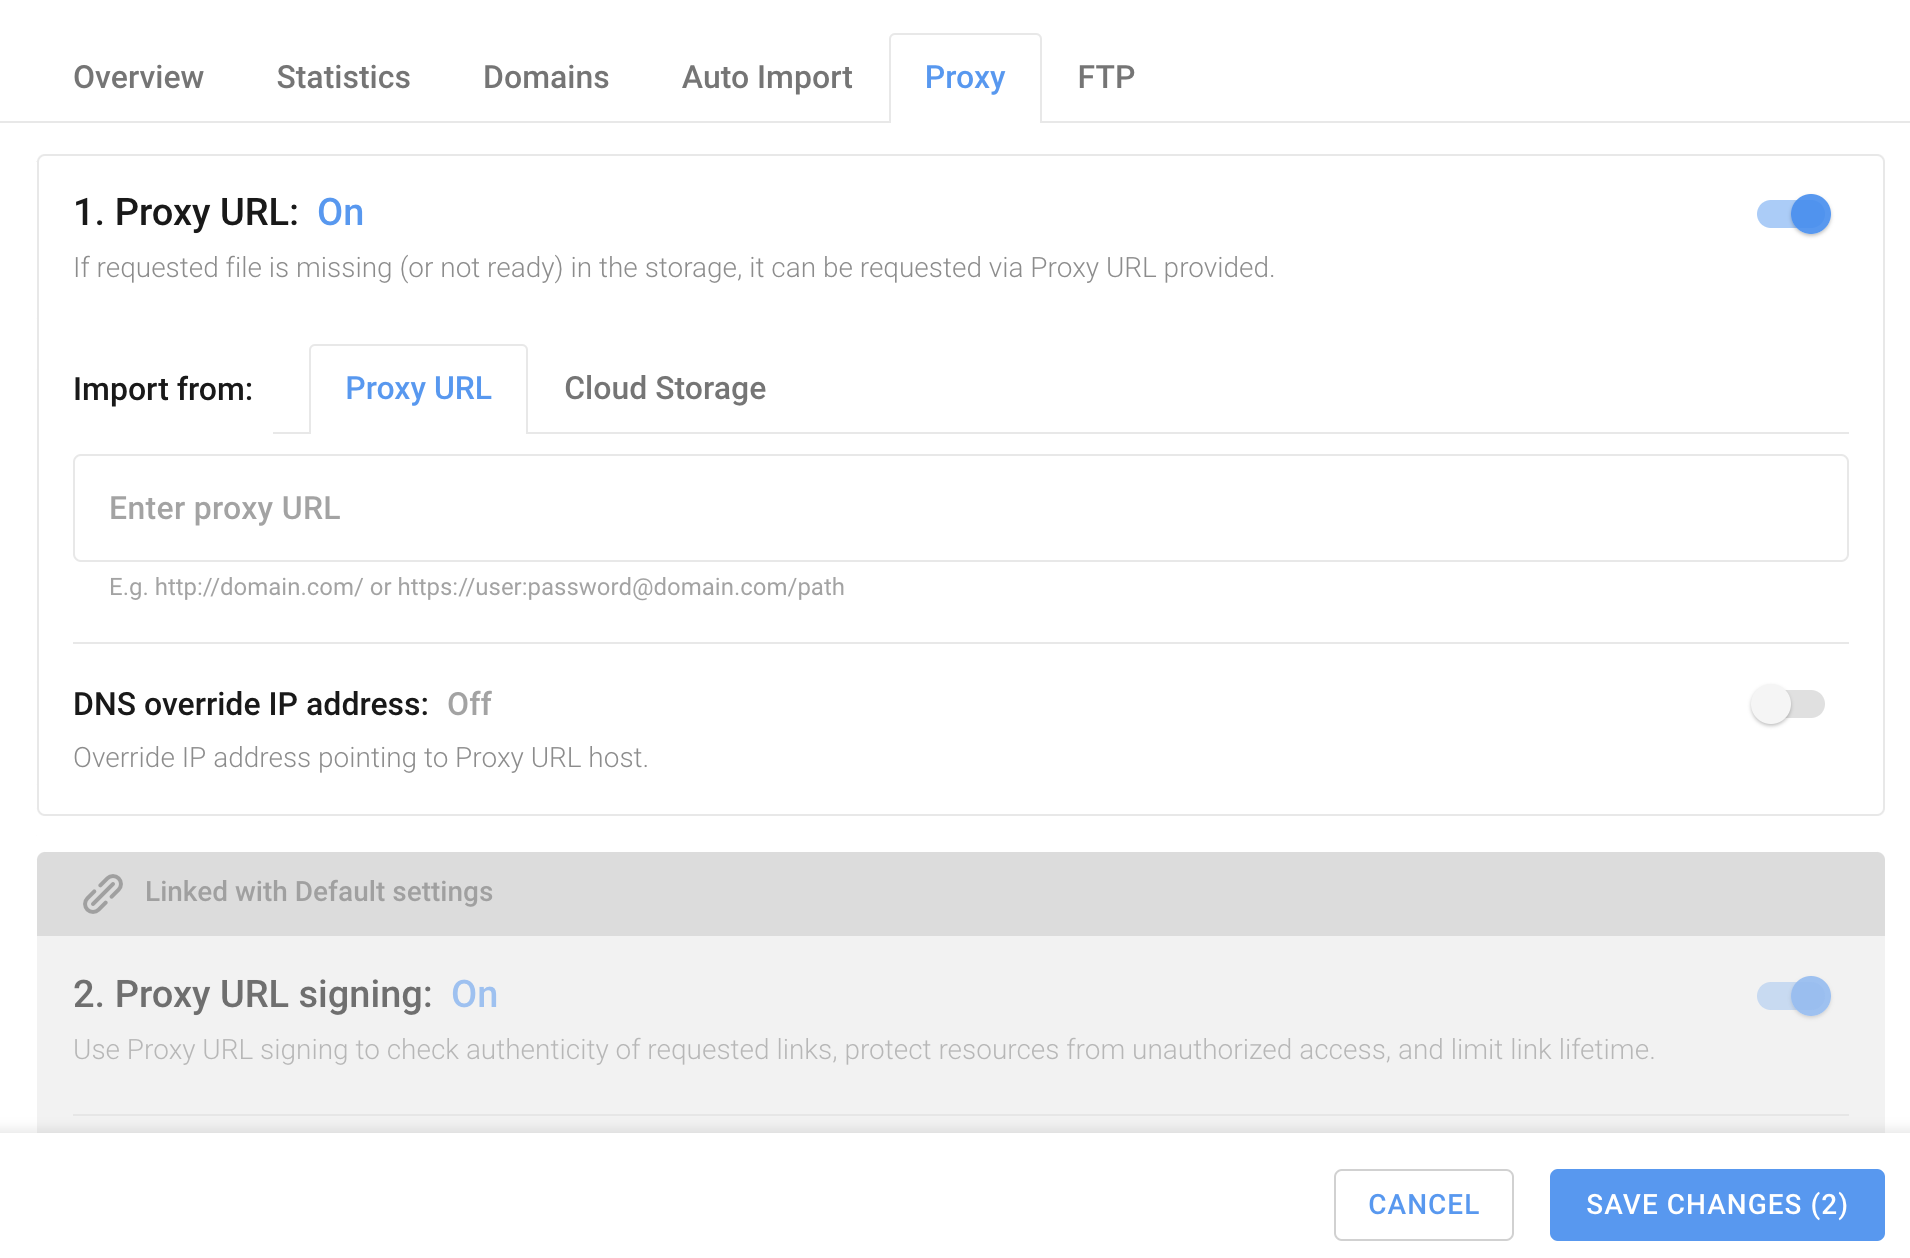
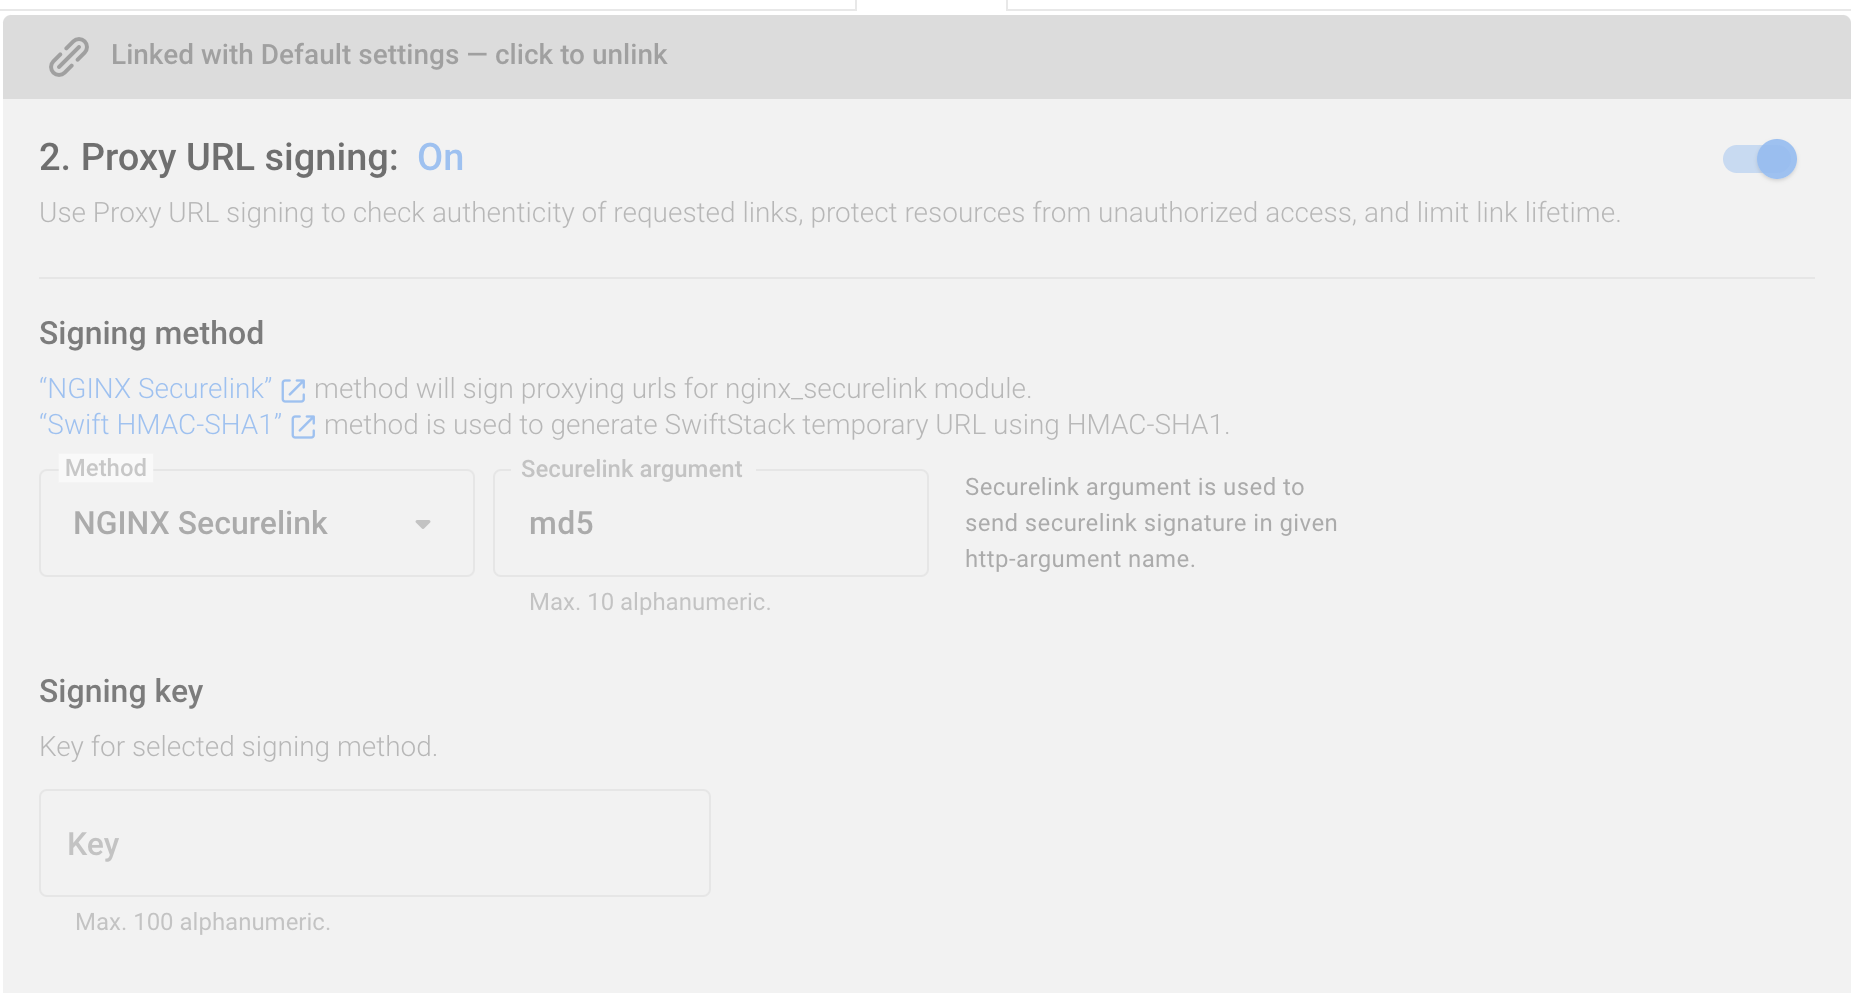
Initially the Default Proxy Settings are applied to your Resource. To set up individual parameters for certain Resources, click the “Linked with default settings” state, make the necessary adjustments, and hit the Save button.